 I was fortunate enough to learn from a good friend of mine called Angel from San Sebastian, a fisherman by trade and from a long line of fisherman going back several generations, this great recipe.
Fishermen are renowned for being tough people and Angel is no exception, contradictory to what his name may imply... He has a handshake that would crush your fingers if you gave him half a chance so every time we meet I make a conscious effort to give a firmer and firmer handshake to try and counteract the force he exerts! So when I saw him working in the kitchen in such a delicate manner it seemed quite surreal. He was preparing his mother’s preserved White Tuna (when it is cooked it turns white), or as they refer to it here as “Bonito del Norte” (Thunnus alalunga) which is more highly prized than normal tuna fish for its fantastic delicate flavour, which is not at all “fishy”. This was something that I had always wanted to learn as I find myself eating canned tuna throughout the year and it seems to be getting more and more expensive every year and the quality worse and worse, although by UK standards it is still pretty good.
Buying good quality preserved tuna can set you back an arm and a leg so I thought now was the ideal time to learn and also share this discovery with you all. I am not going to pull the wool over your eyes, it is simple but it is also very time consuming so I suggest you make a lot of it to last the entire year! It's like a large Christmas dinner; after making the stuffing from fresh chestnuts, the garnishes, roasting and basting the turkey, puddings etc. its such a palarva that you need a year to bring yourself round to doing it again! Maybe I’m exaggerating here, but I haven’t really preserved much food before, just chutneys and the odd raspberry jam when I used to help my Dad as a kid, a huge chutney fan! So this was a first for me, at least with fish.
Being honest fish isn’t my cup of tea but I am a lover of tinned/preserved tuna, I never get tired of it so I always have it in the cupboard like most other people in the country, but when I tried the real deal, homemade preserved tuna, the difference was outstanding and well worth the effort, once it's done, it's done and you can spend the entire year enjoying it! October is pretty much the month for the White Tuna season so it should still be readily available in supermarkets at around 8-10€/kg but if you go straight to the fish market you can get it cheaper, however, if you buy it already reserved in cans you’ll be paying in the region of 24€+/kg for and I eat a lot of tuna, so it adds up at the end of the year and the cost is not so “Bonito”.
There are two ways of preparing preserved tuna you either pre-cook it and then preserve it or you preserve it raw and then cook it in the jar. It depends on how you like your tuna. If you cook it in the jar it will be much softer and delicate and it will keep all of its flavours as nothing is lost in the cooking process. I personally find this method to have too much flavour for my liking, as I am more accustomed to traditional canned tuna, which is always pre-cooked. It's a question of tastes but Angel does it both ways depending on what he is going to use the tuna for. However, I only know the pre-cooked method so far and when I have the raw method I will share it with you.
 17.53.30 - Copy 1.png)
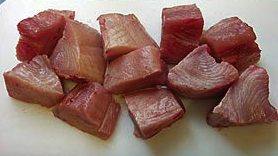
You will need the following ingredients for eight 450g jars:
2,5kg White Tuna (Bonito del Norte)
Rock Salt
1L Extra Virgin Olive Oil (not a strongly flavoured oil, so Arbequina is a good choice, we want no bitterness and no pepper otherwise it will overpower the taste of the tuna)
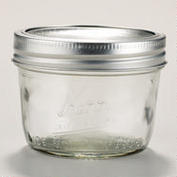
8 Jars (450g each) for preserving food.
You can either ask for the tuna to be cleaned and deboned in the supermarket or do it yourself at home, but whatever you do make sure it comes in large pieces or in thick slices of about 2cm. Make sure you have a pot which will take all the fish in one go or you be at it all day.
1. Place the tuna in the pot and cover it with saltwater. The water we need to prepare beforehand. So we should mix about 240g of rock salt with 3 litres of water. Once it has completely dissolved add it to the pot, if the water doesn’t completely cover the fish repeat this step until the tuna is completely covered by the saltwater.
2. Turn on the extractor fan and close the kitchen door, otherwise the house smell of fish, a little...
3. Put on full heat until it is boiling, remove the lid from time to time to scrape off the foam, which rises to the surface of the water. When it is boiling, lower the heat to a minimum and continue cooking for 60 minutes. Make sure the tuna is always covered with water, so you’ll have to be patient and keep a close eye on it.
4. After 60min. turn off the heat and let the tuna and the water cool down naturally, about 4 hours later it should have cooled down enough, take it out of the water and dry it completely with a kitchen towel. Wrap the fish in tin foil and leave it in the fridge overnight so it cools down completely and the meat hardens becoming more compact.
5. The next day, the first thing we need to do is sterilise the jars, you can either do this in the oven or in a pressure cooker. You could place them in boiling water for 30 minutes but really to be sterilised completely they need to be at a minimum of 120ºC for at least 30 minutes, so to be on the safe side we put them in the oven at 140ºc for 40min. There is a bacteria that can survive without oxygen and it is only killed at temperatures above 120ºC, I can’t quite remember what its called but we don’t want it, just in case! If the jar lids have a rubber seal, well you will have to sterilise them in water with a pressure cooker. Once sterilised let them cool down upside down on a clean cloth/kitchen towel. Make sure they are completely dry before filling them.
6. Take the tuna out of the fridge and place it all on a large tray. If you already cleaned it before cooking 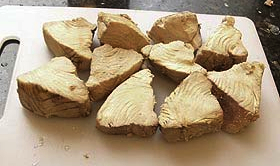 (which we did) all you have to do is remove the unsightly dark pieces if there are any left. If you didn’t clean the fish beforehand remove the skin, bones and darker coloured pieces of tuna fish. All we want is the clean white flesh. Cut up the pieces of tuna meat into large chunks or strips, but measure the ideal size according to your jar and remember that we need at least 1cm of air between the surface of the oil and the jar lid so we can create the vacuum later.
7. Now pour about 1 cm of extra virgin olive oil into the jar, we pour this in first so that when we start to pack the jar with tuna no gaps of air are trapped at the bottom. Start to place the pieces of tuna steak in the jar and make sure you pack them very tight but be careful not to break them. Once full if you need more olive oil top it up and make sure all the tuna is completely covered with oil but leaving at least 1 cm between the oil and the top of the jar. Bang the jar a few times on the table to make any air bubbles come to the surface or use a bbq skewer or something similar to carefully move the tuna inside and make sure the oil is evenly distributed and there are no air bubbles.
8. Now close and seal the jars very tightly. Place them in a pan of boiling water to poach them. Make sure the water does not reach or touch the lid. Boil them for 30 minutes. This is to create the vacuum inside. After 30 minutes remove from the heat and leave the jars in the water for approx. 3-4 hours, then we remove them and place them upside down on a kitchen towel overnight to make sure the vacuum has been created properly.
9. The following morning put them away in storage for 3 months before opening. You will need a cool dry 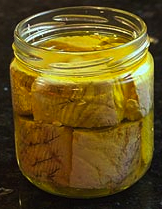 ventilated cupboard. If you don’t have one you can also keep them in the fridge. You will need this time for the flavour to settle in. The day you open it if you notice the slightest unusual smell or discolouring discard it immediately. More than likely the vacuum wasn’t done properly or the jars were not properly sterilised. Don’t risk it, chuck it out. However, if you take care and follow the steps you shouldn’t have any problems. However, if the centre of the lid doesn’t flex it is a sign that the vacuum seal has been done correctly and as this method involves a double technique for the vacuum it should be fine.
Preserved tuna can last in good storage conditions easily a year, if you need any longer, you prepared too much! Once opened it will last up to two weeks in the fridge. None the less I suggest preparing jars that are suitable for the amount you might need in one sitting depending on how many you are in the household. I find ½ pint jars to be ideal for two people. And my last piece of advice is that you buy a good quality extra virgin olive oil. After all that oil will be your tuna’s home for quite a few months and I personally wouldn’t want a refined oil being soaked up by my tuna steaks!
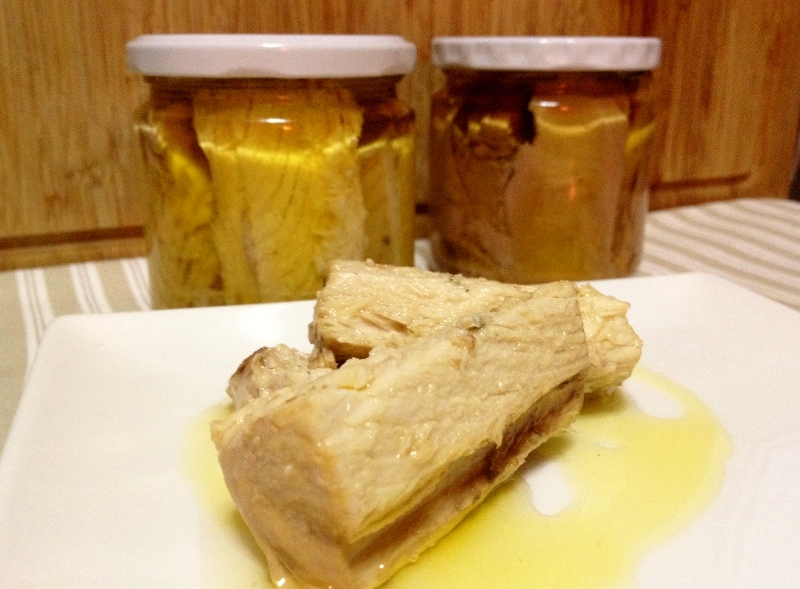
So there you have it,
Happy Eating!