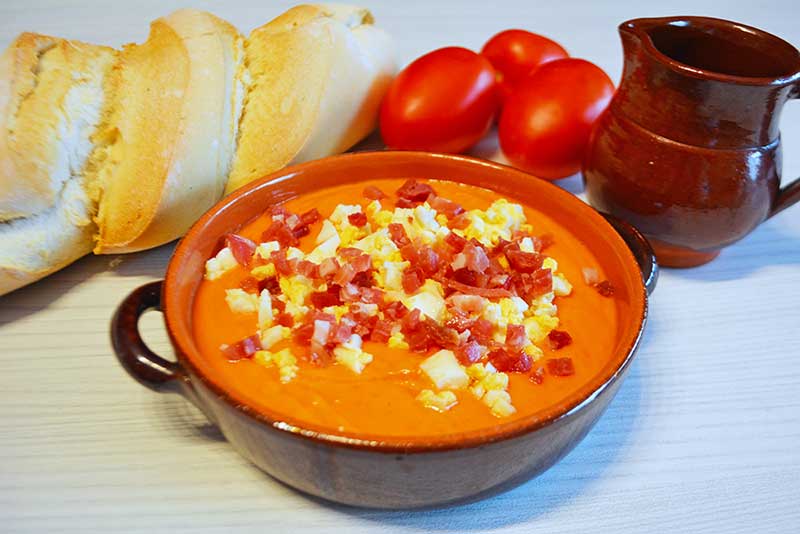
The Authentic Salmorejo
Tuesday, July 8, 2025
Believe it or not but ‘Salmorjeo from Cordoba has its own culinary guild which works to make this traditional recipe the ambassador of the city, its culture and cuisine, so each year they organise an event to promote this wonderfully versatile dish. For two days, lectures, panel discussions, cooking demonstrations, tastings are conducted in the city in order to help disseminate the authentic Salmorejo recipe to the rest of the world.
The guild conducted an initiative that turned this star dish into a 'Universal Salmorejo' and thus standardised the recipe and ingredients. As you probably know, it has many variations and every household adds its own personal touch. They wanted to establish a traditional protected recipe, which would become an emblem for the region. A panel of expert tasters approved the recipe after researching the most common proportions between ingredients and rounding them off to a standard.
So I thought I would share this recipe with you all and hope you can enjoy yet another refreshing meal during the scorching heat of Spain's imminent summer.
Ingredients:
- 1 kg of ripe plum tomatoes
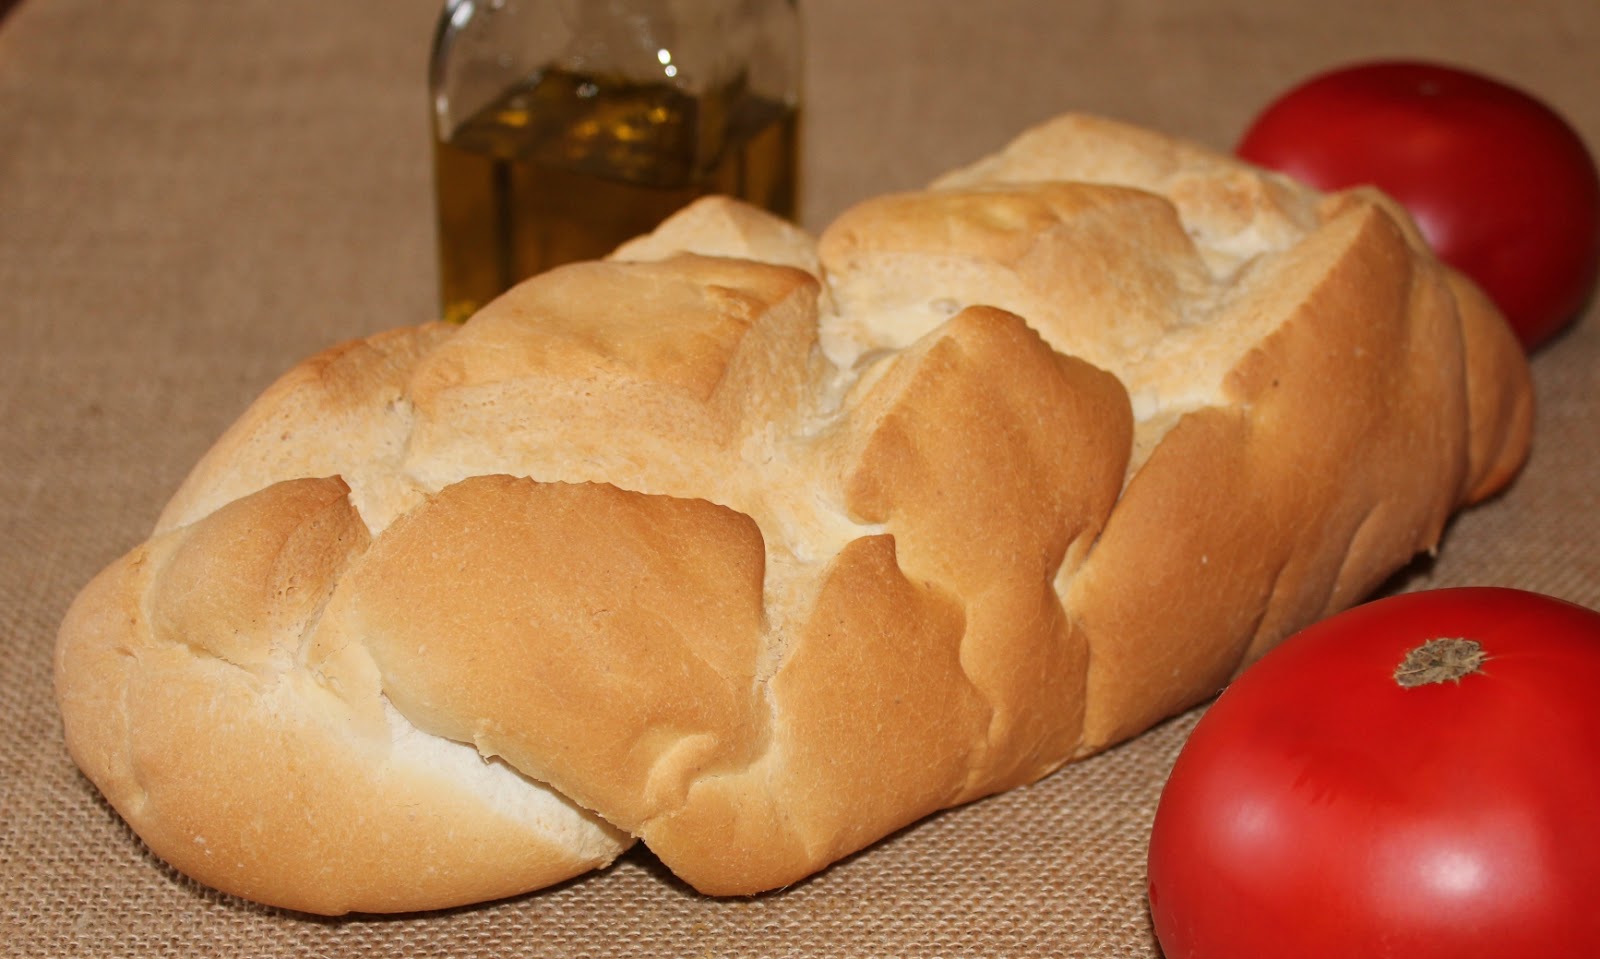
- 200 gr. Telera Cordobesa Bread (this is a bread with a thick, heavy dough. Better if it is a day old too) 'Pan de Hogaza' in Spanish supermarkets, if you are not in the region!
- 100 gr. de Extra Virgen Olive Oil
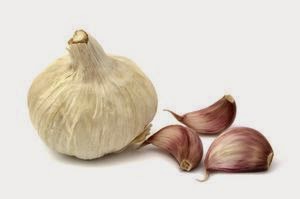
- 1 ‘Montalban garlic’ clove from Cordoba - but any garlic clove will do if you can't find the original!
- 10 gr. de Sal
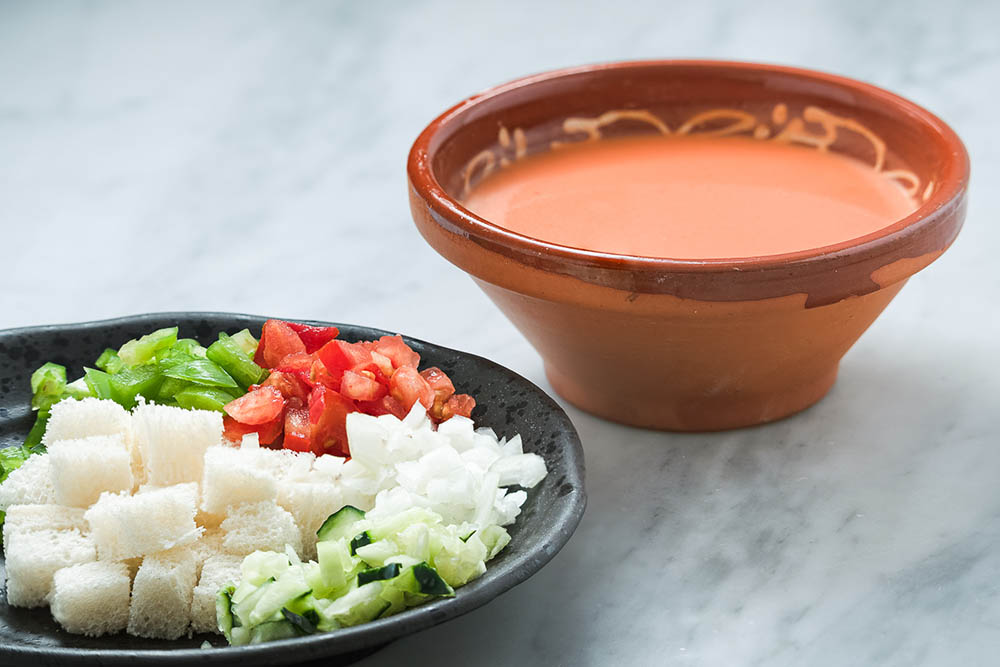
Wash, scald in boiling water and then place in cold water to separate the skin from the flesh of the tomato. Peel the tomatoes and blend them in a food blender, pass the liquidised tomato through a sieve to remove the seeds. Then pour it back into the blender and start blending again, while at the same time adding the garlic, then the bread, olive oil and salt until you have a homogenous mixture which is thicker much thicker than gazpacho, similar to a thick puree. Depending on the density of your bread dough you may need to add more or less, also the water content of your tomatoes will also influence the result so you may need to add more or less bread accordingly for whichever reason. Make sure you don't add all the bread at once, add it bit by bit and test for consistency as you go.
Finally, sprinkle chopped boiled egg and finely diced Serrano ham over the top and serve. Personally, I like to put my serrano ham in the microwave for 1 minute to crisp it up! It gives it that extra dimension and a little salty kick, which I love. It really is a simple, but delicious meal.
Enjoy!
 1
Like
Published at 1:38 PM Comments (1)
1
Like
Published at 1:38 PM Comments (1)
It's Summer Time - Horchata!
Friday, July 4, 2025
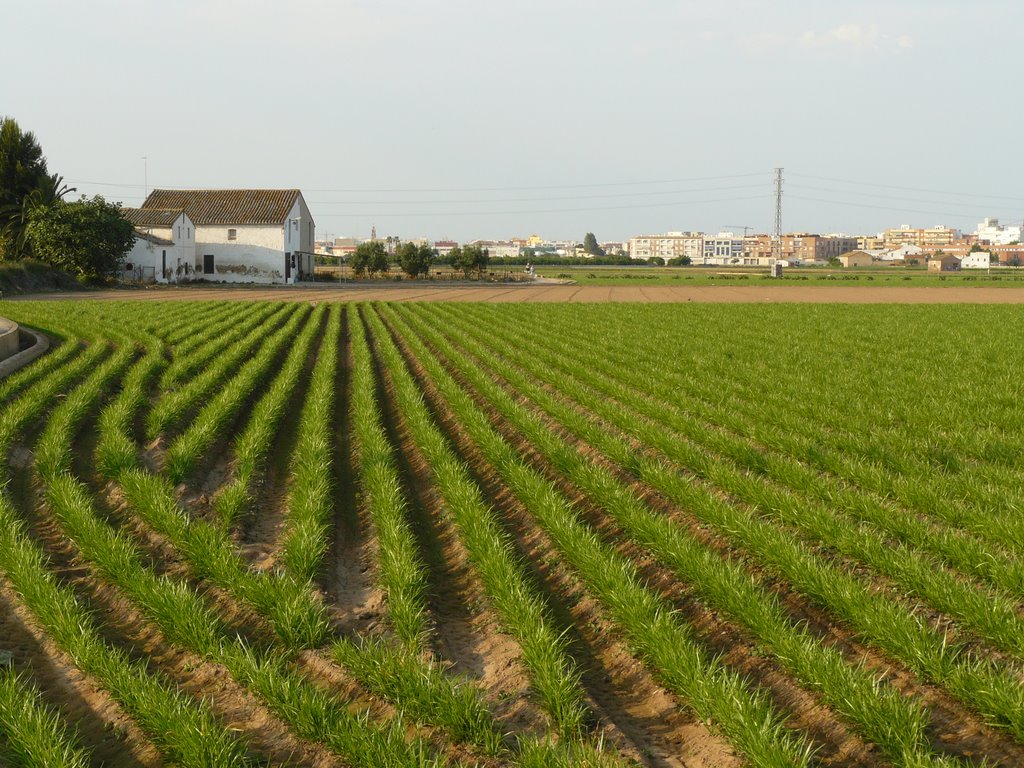
For those who are not so familiar with this summer refreshment, I thought I would share some of its history and how it is grown in and around Alboraya, next to Valencia.
It is made from chufa, which in English would be the tiger nut and as a drink it goes back thousands of years. Old civilizations such as the Egyptians left samples of this healthy product in their tombs and sarcophagi. Also, diverse Persian and Arab authors already mentioned in their writings the digestive benefits of the chufa. But it was in the 13th century when the Arabs introduced their crop in the Mediterranean area.
Valencia was and continues to be the only area in Europe where chufa is grown. Currently, it is farmed in 16 towns around the area known as L'Horta Nord (or the Northern fertile land), which surrounds Valencia.
Alboraya is the world capital of Horchata and if you ever happen to be passing through Valencia I highly recommend you visit Horchateria Panach on the main road that runs through Alboraya. It is as good as it gets and also at an unbeatable price.

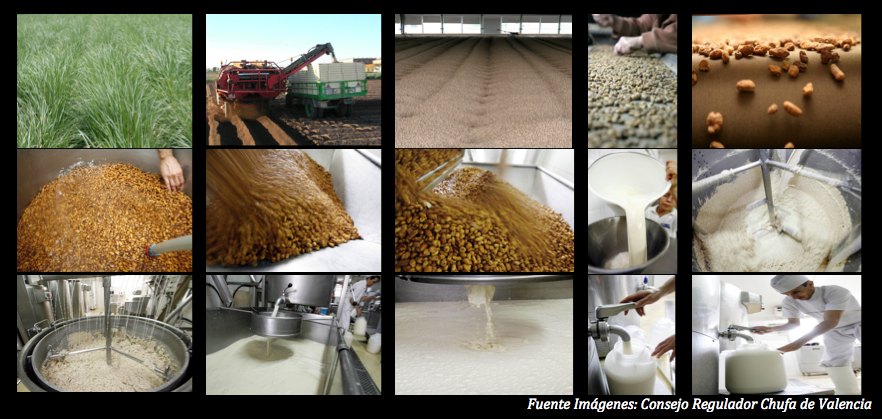
The chufa is cultivated in sixteen Valencian towns in the L'Horta Nord area, where a few specific climatic requirements combine and make it the only area of Spain where such a unique tuber is cultivated. About 5.3 million kilograms of tiger nut is produced in this area, of which 90% are covered by the Denomination of Origin.
The tiger nut from Valencia (Cyperus esculentus) is a herbaceous plant of around 40 to 50 centimetres in height. It has a rhizome radicular system from which some little roots grow and in the tips of these roots, the tiger nut is formed.
The chufa is sown from March until May, a date which is determined by the previous crop. Before the planting begins, a series of preparatory work is carried out, so that the soil remains spongy, loose and well levelled. The planting is carried out in a mechanical fashion, in ridges 20 cm high with 60 cm between them. The depth of the seed is from 4 to 5 cm. The depth of sowing is an important aspect since the yield and the quality of the tuber depend greatly on these measurements.
The harvest is carried out from November to January. Once the plant has completely withered and dried, it is burned and the ashes and remains are cleaned up. Then, it is sown again mechanically. A few weeks after the new planting, the tuber germinates. You shouldn't miss the opportunity to see the legendary irrigation ditches of Roman origin, improved and expanded by the Arabs throughout the area, which still remain.
Legend says that a young villager from the fertile area of Valencia known as L'Horta offered King Jaume I a white and sweet drink. The King, very pleased, asked; "Qué es això?" (What is this?), and the young woman answered, "Es llet de xufa" (It's tiger nut milk). The King, having tasted the drink replied, "Això no es llet, això és OR, XATA" - This is not milk, this is gold (=OR), pretty girl (=XATA)"
Legend or reality, the drink became famous throughout the country, adopting the name of Horchata de Chufa. This drink is a refreshing and essential product in the Mediterranean diet thanks to its innumerable and healthy benefits.
Known since antiquity as a source of vitamins and nutrients, the horchata is also considered a source of health and energy the world throughout. Along with its delicious and refreshing flavour, several medical studies have accredited its many beneficial properties for the body. Investigations have concluded that the horchata has great digestive properties thanks to its high level of amino acids and starch.
Several prestigious specialists from the University of Valencia have also determined that it is rich in minerals such as phosphorous, magnesium, potassium and iron as well as unsaturated fats and proteins. It is also recommended for all types of people, from the youngest to the oldest. The natural horchata can also be drunk by patients with a declared lack of tolerance to lactose and it is recommended for pregnant women as it includes more iron and potassium than a glass of milk.
It is an energising and nutritious drink that, thanks to its characteristics, has become part of the Mediterranean diet. Its cardiovascular properties are similar to those present in olive oil and it helps in reducing cholesterol and triglycerides as it has over 77% of oleic acid. All these characteristics make the Horchata of Chufa of Valencia a very complete and nutritious drink thanks to its macro and micronutrients. So be sure to try some the next time you are in Valencia this Summer. Enjoy!
4
Like
Published at 11:04 AM Comments (2)
My 'Go-To' Summer Salad
Friday, June 27, 2025
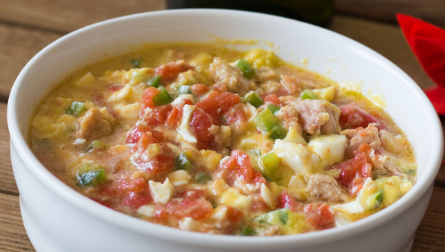 Every summer, I feel the need to share this recipe with as many people as possible. With the heat in full blast, I only feel like eating cold soups and salads, which can quickly get quite monotonous. Now is the time of year I start making my go-to salad for the summer months, which is both refreshing and filling. It is a local "salad" from the Mancha. A salad that is also enjoyed in Andalucia, and no doubt has many variations the further south you go. It is called Pipirrana. Now, I have no idea why, but I do know that it was able to keep a man alive for almost 50 years. My father-in-law lived off it literally every day. In fact, I don't really have memories of him ever eating anything else. It was his staple for as long as I knew him. He passed away many years ago, but the tradition carries on in our household. One thing is for sure: it is a balanced meal and cheap. This is what you'll need: Every summer, I feel the need to share this recipe with as many people as possible. With the heat in full blast, I only feel like eating cold soups and salads, which can quickly get quite monotonous. Now is the time of year I start making my go-to salad for the summer months, which is both refreshing and filling. It is a local "salad" from the Mancha. A salad that is also enjoyed in Andalucia, and no doubt has many variations the further south you go. It is called Pipirrana. Now, I have no idea why, but I do know that it was able to keep a man alive for almost 50 years. My father-in-law lived off it literally every day. In fact, I don't really have memories of him ever eating anything else. It was his staple for as long as I knew him. He passed away many years ago, but the tradition carries on in our household. One thing is for sure: it is a balanced meal and cheap. This is what you'll need:
Ingredients to make Pipirrana 2-3 servings:
Very ripe tomatoes - best plum tomatoes 750 g
Green pepper - 1/2
Boiled eggs - 3 large or 4 medium
Garlic - 1 small clove without the germ/root
Coarse salt - 1/2 teaspoon
Picual or Hojiblanca extra virgin olive oil - 50 ml (if you don't have either, any EVOO will do)
Tuna in olive oil - 1 medium-sized can
White wine Vinegar - 2 tsp - but best add to taste - little by little. I like it quite strong so I tend to add more.
Steps:
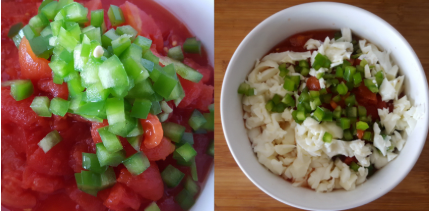
1. Peel the tomatoes by scalding them in boiling water (all you need to do is cut a cross into each end of the tomato and then leave them in boiling water for a couple of minutes). Then we cut them into small cubes/chunks taking care to collect all the juice released. This is one of the secrets to a great Pipirrana. So the easiest thing is to actually cut them up in the actual bowl you are going to use for mixing all the ingredients.
2. In a mortar, we put the garlic clove, the coarse salt - you can use fine salt, but in the mortar, the coarse salt helps the blending -, a small handful of the chopped green pepper and the yolks from the 3 or 4 eggs. We grind and mash everything together and then finally add the oil, which we will add little by little until it is emulsified. You can do this in a food processor too if necessary.
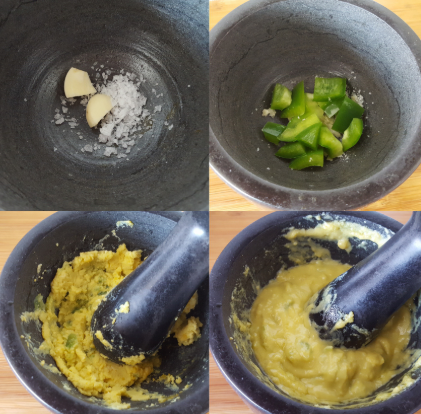
3. We add the rest of the chopped pepper and the chopped egg whites to the tomatoes and pour over the dressing. Add the vinegar and slowly blend in to taste. You may want to add more salt at this point if necessary.
4. Add the drained tuna to the bowl and mix well, cover with a plastic wrap and let it rest in the fridge for at least 4 hours before serving. The best thing is to prepare it at lunchtime and let it rest until dinner, or do it overnight.

Naturally, this recipe is open to manipulation, so you can add whatever tickles your fancy. When you are ready to serve, just get some fresh, crusty bread and start eating and soaking up that wonderfully rich dressing.
I warn you, it is extremely refreshing and extremely moreish!
Enjoy!
1
Like
Published at 9:39 PM Comments (0)
Summer Wine Recommendation - Val Do Sosego
Friday, June 20, 2025

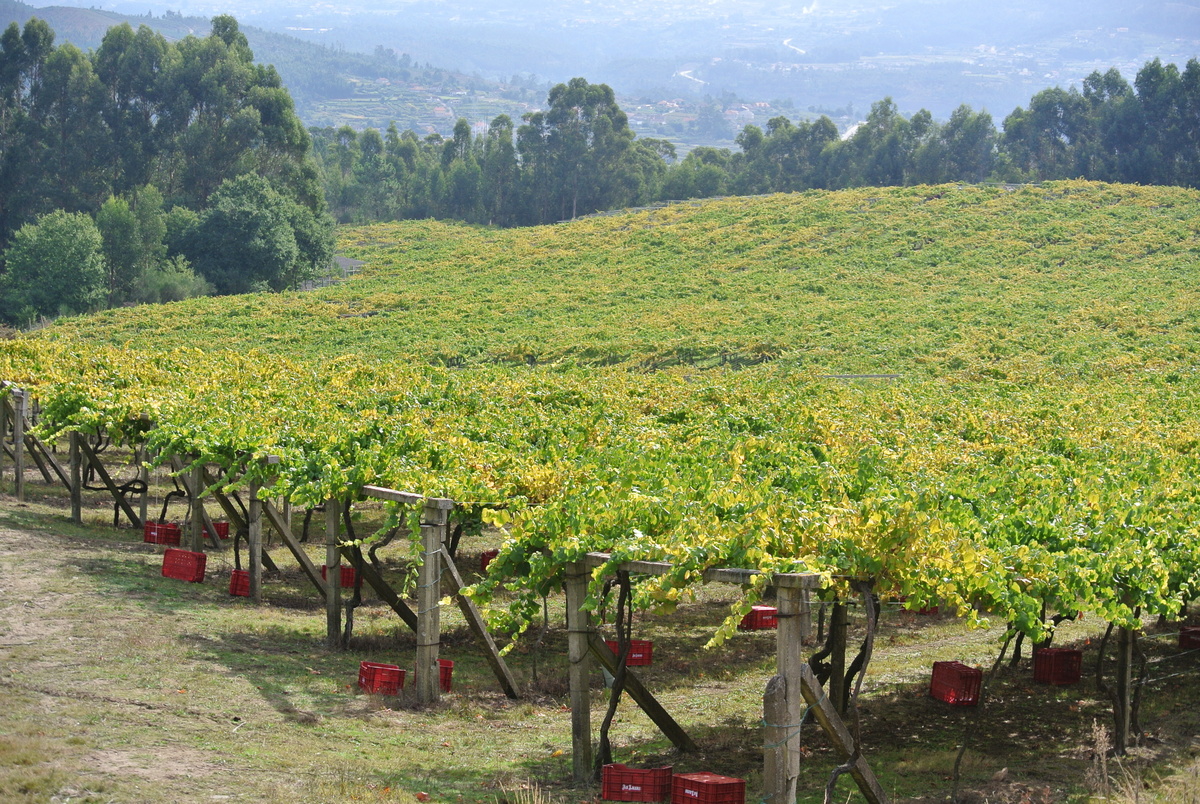
 The summer is upon us and so is the season for crisp, chilled white wines! The wine I am going to share with you today is a wonderfully fresh and balanced Albariño from Rias Baixas – the heartland of this increasingly popular grape variety in the north west of Spain. The summer is upon us and so is the season for crisp, chilled white wines! The wine I am going to share with you today is a wonderfully fresh and balanced Albariño from Rias Baixas – the heartland of this increasingly popular grape variety in the north west of Spain.
Albariño is by far my favourite grape variety for whites, it just has everything I look for in a white. However there is a difference from one winery to the next and the wine in question today is VAL DO SOSEGO produced by AS LAXAS Winery in Arbo, Pontevedra. I discovered it several years back in Carrefour when I was looking for a new 'white' to accompany a lobster rice I was going to prepare for some friends who were coming to visit. I still remember when I took the first sip, it was one of those " wow this is good!" moments and since then it is amongst my top Spanish whites.
It is relatively light at 12.5% abv, with just the right balance of fruit, aromatics and minerality. It's crisp, lemony aromas are as pure as a sea breeze. The palate is just as pure and fresh, with ripe apple, citrus, pineapple and stone fruit flavors all mixing well. It is an elegant wine with just the right finishing weight and length. It was the best 'new' white wine I had tasted for a long time, after experimenting with many others.
The As Laxas Winery has been producing wines since 1862. At the time the property had roughly a hectare of traditionally grown vineyard and what began as a complementary activity to the family economy became over the years a company in itself. The company is still true to the vision of the family who, from the beginning, was enthusiastic in obtaining a premium quality white wine. Nowadays, the company is property of the founders’ four sons and has around 50 hectares.
WINE DATA:
Price: €8.95 ( Carrefour)
Grape variety: Albariño
Appellation: Rias Baixas
Alcohol: 12.5%
Best served cold : +/- 8ºC
https://www.laxasshop.com/en/val-do-sosego/3-val-do-sosego-albarino-rias-baixas-6-botellas.html
3
Like
Published at 9:19 PM Comments (0)
Courgette & Avocado Gazpacho
Saturday, June 7, 2025
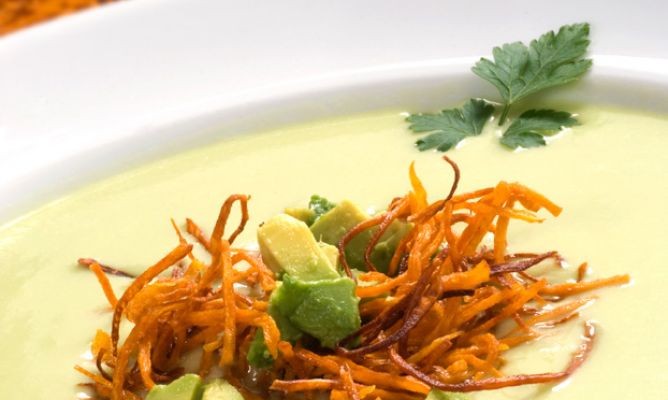
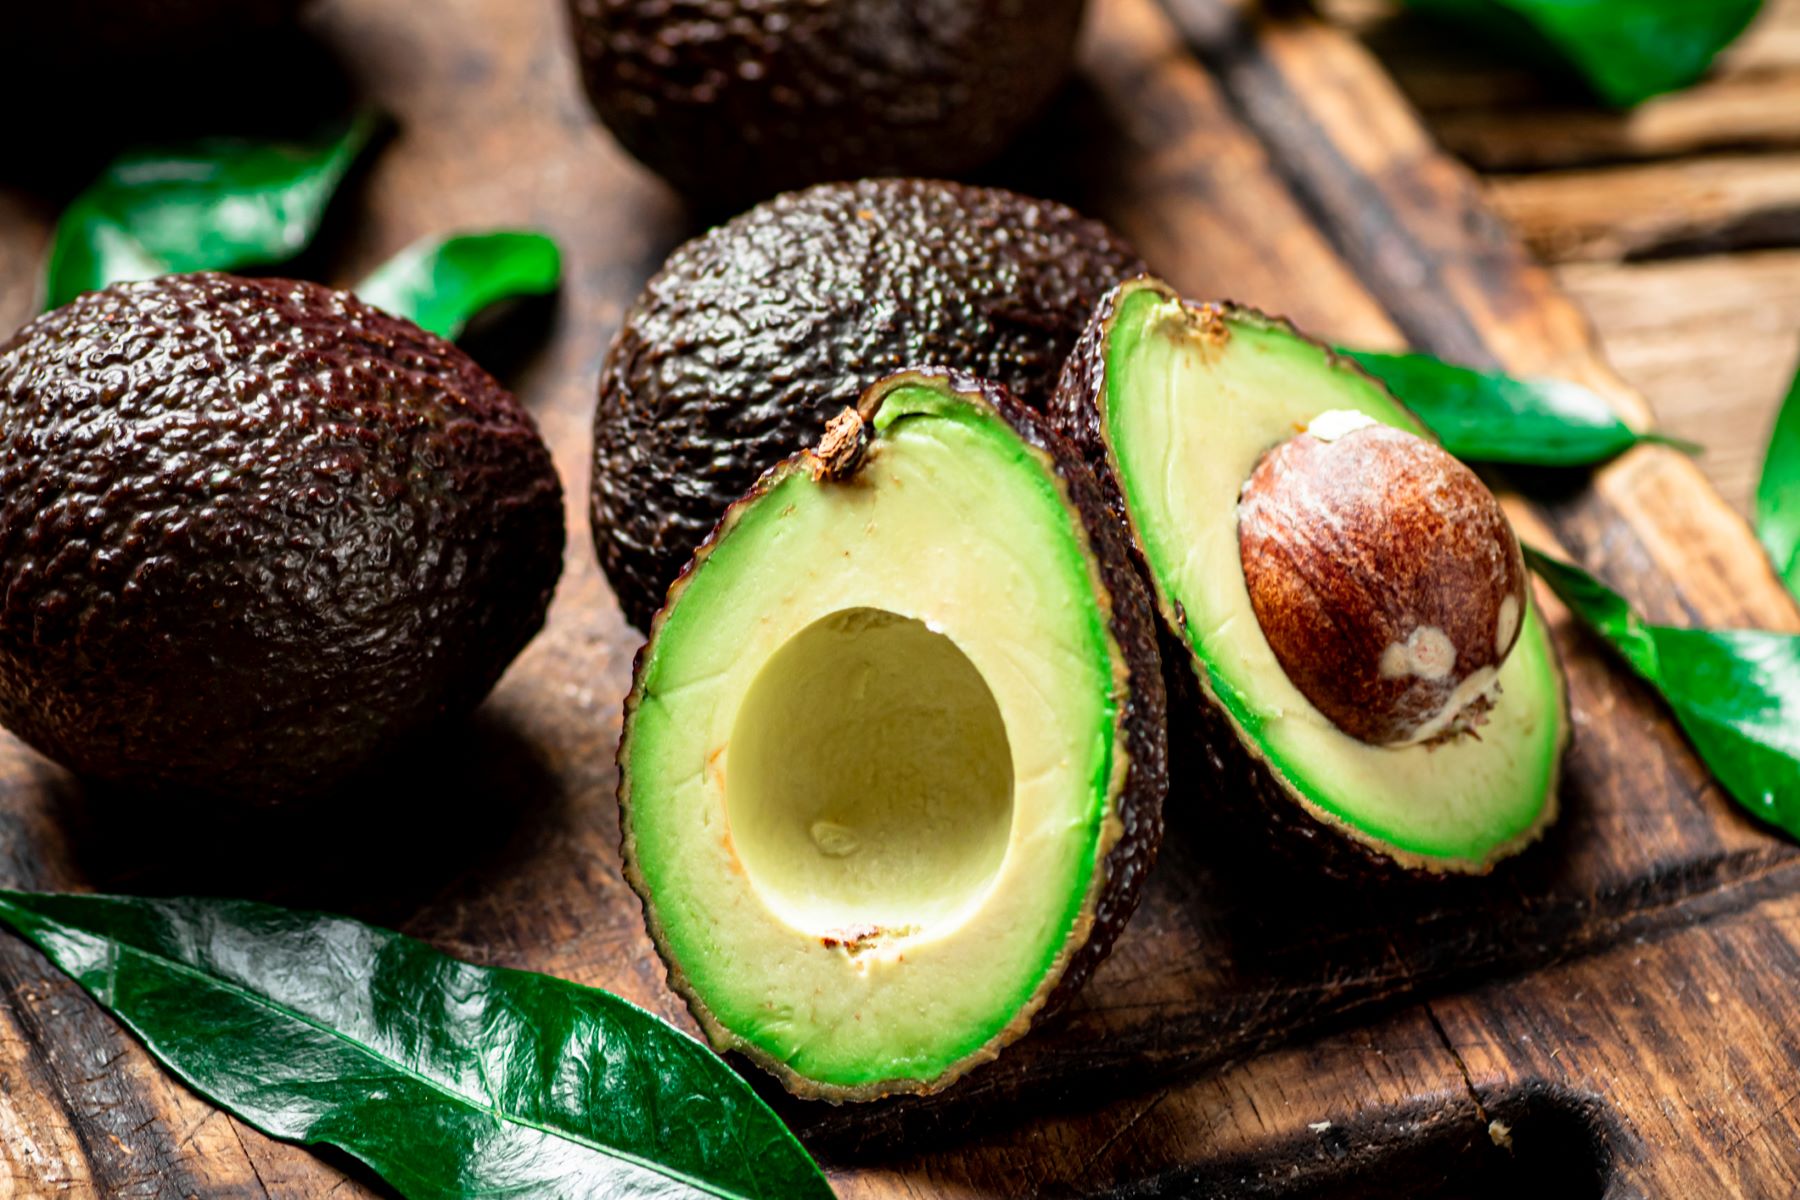
Most cold soups in Spain are based around the tomato, such as Gazpacho Andaluz or Salmorejo, this one is based primarily on courgettes and avocados. It is wonderfully refreshing and delicate in flavour. It is ideal as a starter for any meal, be it fish, meat, or rice. Avocados are readily available right now, too. So make the most of them!
The avocado is a product originally from the American continent, where the Aztecs believed it had aphrodisiac properties. Since pre-Columbian times, it has been cultivated in Mexico and the rest of Central America under the name "ahuacatl".
In the seventeenth century, the Spaniards, who named it the Indian Pear because of its similarity to the national pear, took it to the West Indies, while the Portuguese took it to Brazil.
In the eighteenth century, the Spanish adventurers introduced it into the Canary Islands via the Botanical Garden of Orotava, where it jumped to the Peninsula. Now it is generally cultivated in the Mediterranean area, from Murcia down to Andalucía.
It is such a simple recipe to make and healthy at the same time, so I hope you enjoy it.
The Ingredients you will need for 4-6 people are the following:
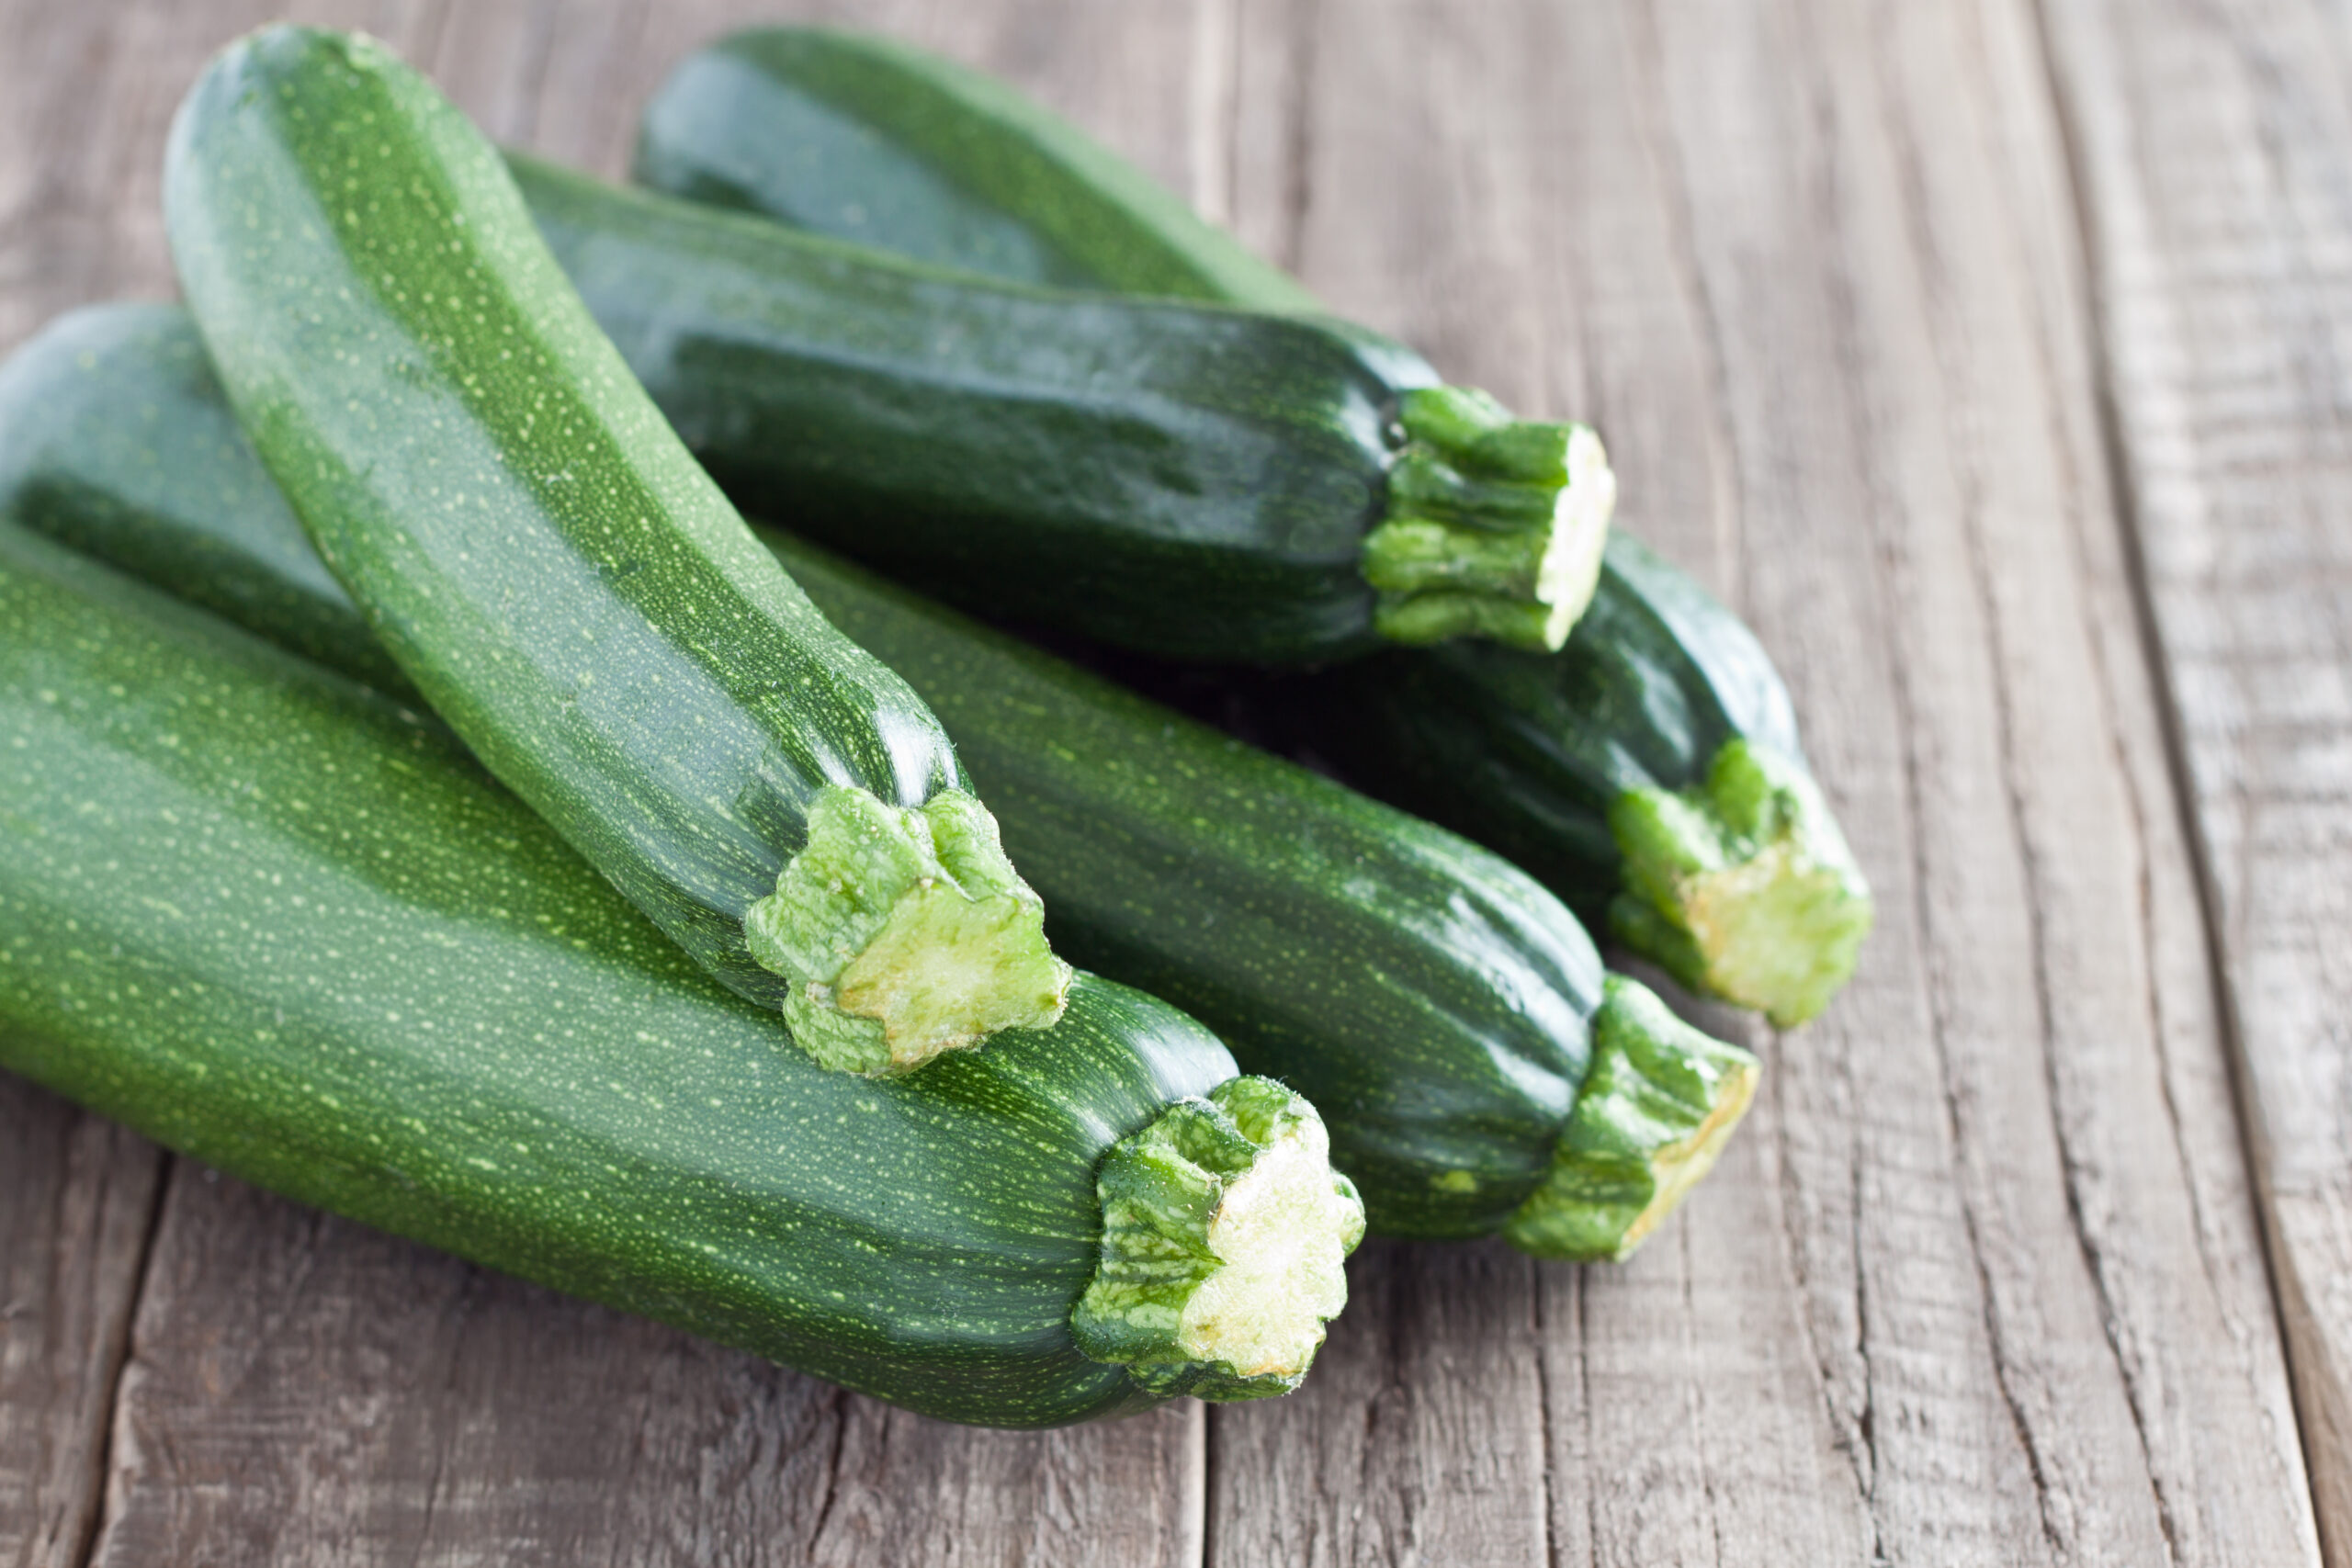
2 large courgettes, peeled or unpeeled, chopped
4 large ripe avocados - make sure they are ripe and not hard.
2 large chicken carcasses for stock (or ready-made chicken stock, enough for 4-6 servings)
1 cup evaporated milk or oat milk if you want a dairy-free option (approx 200ml)
1 sweet potato
1 lemon
Extra Virgin Olive Oil (preferably a good Picual – eg, Oro Bailén)
Salt, Pepper
A handful of flat parsley
A handful of fresh cilantro leaves
3-4 fresh mint leaves
2 large cloves of garlic, finely chopped
1 shallot finely chopped
Water
Put the chicken carcasses in a pressure cooker with water (covering the carcasses), with the parsley and a pinch of salt and pepper. Close the cooker and cook on mark 2 for 5 minutes once the safety valve has risen. Once cooked, sieve and let it cool down.
- Cut three avocados in half and scoop out the flesh into a bowl. Add the juice of half a lemon.
- Chop the courgettes into cubes and remove the stalks from the cilantro, putting the leaves to one side.
- Add your garlic and shallots to a small saucepan. Add 1 tbsp. of water, and on low heat, bring to a light simmer. You do not want the garlic or the onion to brown; you want to help remove any bold flavours that are sometimes hard to digest when raw. Once your onions/garlic are translucent, around 2 minutes of cooking, stop.
- Add all your ingredients to a high-speed blender and blend till smooth. This may take up to 1-2 minutes.
Pour part of the chicken broth and continue blending; it should have a light consistency. Add the 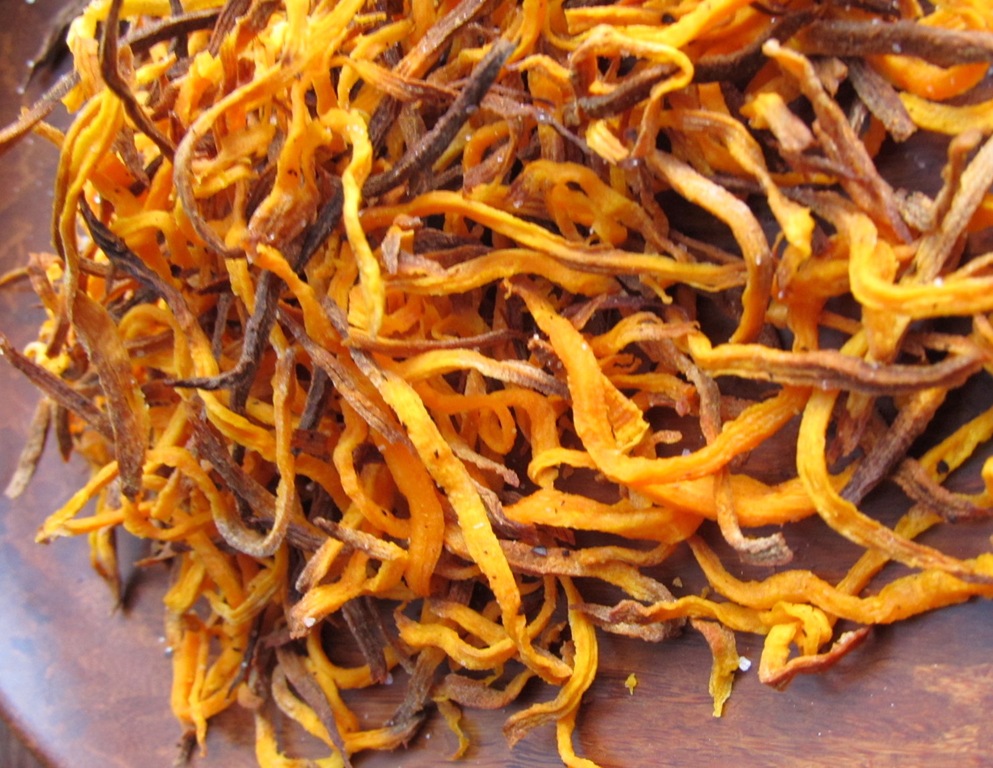 evaporated milk/ oat milk and continue blending. Add a pinch of salt and pepper to taste. evaporated milk/ oat milk and continue blending. Add a pinch of salt and pepper to taste.
Peel the sweet potato and cut into very thin strips “Julienne” style, effectively we want potato straws, so nice and thin. Fry in a pan with hot olive oil. Remove to a plate with some kitchen towel in order to remove excess fat. You can skip this if you want and use croutons instead, but the contrast in the texture and flavour is lovely.
Peel the last avocado, scoop out the flesh and dice it up into bite-size cubes and place to one side. This will be the garnish.
Serve the soup in a bowl. In the centre, place a little chopped avocado and fried sweet potato on top. Garnish with a sprig of parsley, and you’re ready to go.
 You may want to accompany this starter with some toasted bread topped with Iberian ham and olive oil; it accompanies the avocado really well. You may want to accompany this starter with some toasted bread topped with Iberian ham and olive oil; it accompanies the avocado really well.
The sweet potato is a potato-like tropical tuber. They differ in that this potato has a thicker skin and a more elongated shape, but more so in the flavour, which is sweet thus adding a wonderful touch to the dish.
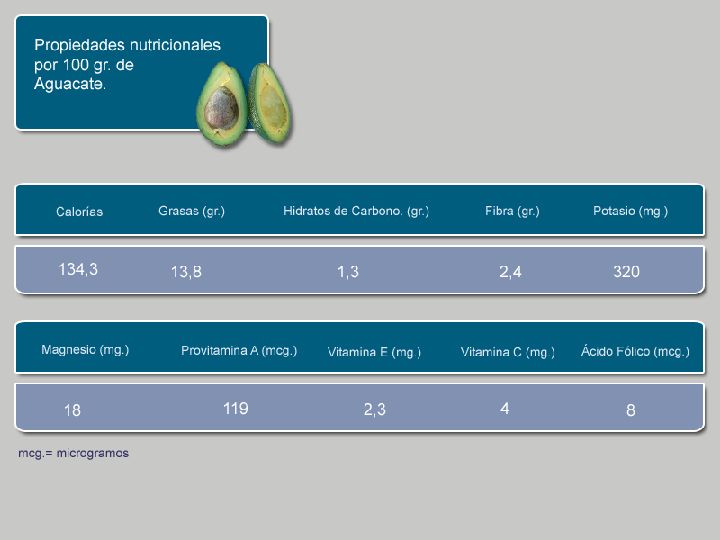
This dish is highly recommended for all children, youth, adults, athletes, pregnant women, nursing mothers and the elderly.
It high contribution of antioxidants and monounsaturated fats makes it a recommended dish especially for those with an increased risk of cardiovascular disease.
Monounsaturated fats have the property of reducing the rates of total blood cholesterol because they elevate the so-called "good cholesterol".
As for the vitamin content of this recipe, there are three that deserve more attention for their antioxidant capabilities: vitamin C, beta-carotene and vitamin E.
Furthermore, due to its richness in magnesium and potassium and its low sodium level, this recipe is highly recommended for those who suffer from hypertension or heart conditions.
Enjoy!
0
Like
Published at 9:39 AM Comments (0)
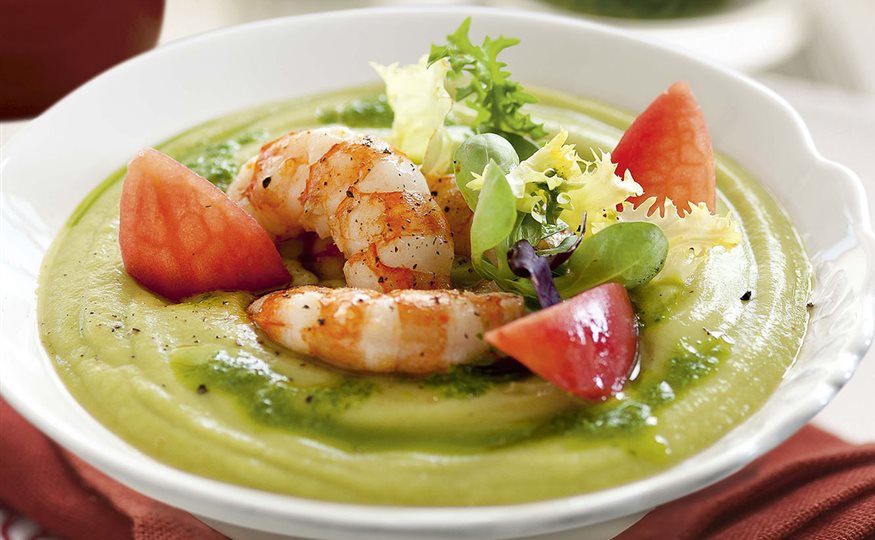
Prawn & Avocado Gazpacho
Friday, June 6, 2025
This week I would like to share with you another gazpacho recipe as temperatures are soaring, a refreshing dish is ideal for any meal. Yes, I love avocados, and I am always trying new ways to enjoy them! I have a few avocado recipes up my sleeve. Today's recipe involves avocado with a slightly different approach to my next recipe, which is based mainly on courgettes but combined with avocados...soon to come.
Avocado gazpacho is wonderfully refreshing and delicate in flavour. Ideal as a starter for any meal, be it fish, meat or rice and if you prefer a more filling dish just add more prawns and accompany with some bread! Avocados are readily available right now too so no better time to give it a go!
This is what you will need for 4 servings:
For the gazpacho:
2 avocados
1 green bell pepper
1 cucumber
1 spring onion
½ clove of garlic
4 tablespoons of olive oil
1 tablespoon of sherry vinegar
1 lemon
Pepper
Salt
For the garnish:
12 peeled king prawns
Some baby leaves - mixed salad
2 pear tomatoes
1 teaspoon balsamic vinegar cream
Olive oil
Pepper
Salt
For the aromatic oil:
10 basil leaves
Extra Virgin olive oil
- Peel the cucumber, wash it and chop it up. Squeeze the lemon. Wash the pepper, clean it and chop it. Peel the avocados cut them in half, remove the stones, take out the pulp and drizzle it with the lemon juice to prevent it from oxidizing.
- Clean the spring onions, removing the roots and the green stalks, and wash them. Peel the garlic. Chop both, and place them in the blender, with the avocado, cucumber and pepper. Add the oil and vinegar. Add Salt and pepper then add a glass of water and blend until you get a homogeneous cream. Put the cream in the fridge, in a covered container.
- Now prepare the aromatic oil: wash the basil leaves, dry them with kitchen paper and chop them up. Grind them with the oil until you get an emulsified mixture. Wash the tomatoes, cut a cross into each end of the tomatoes, and scald them in a saucepan with boiling salted water for 2 minutes. Drain them, cool them in cold water and peel them - where you cut the cross you will see that the skin has started to peel away. Cut them into medium-sized segments and remove the seeds.
- Wash the king prawns(peeled) and pat them dry. Heat a few drops of oil in a nonstick skillet; add and sauté for 1 minute, just until they change colour. Remove and season.
- Wash the salad leaves, pat dry and chop lightly. When ready to serve, divide the gazpacho into 4 bowls or deep plates and arrange the tomatoes, shrimp and salad leaves on top. Water with a few drops of balsamic vinegar cream and a string of the basil oil which you previously prepared.
Enjoy!
2
Like
Published at 8:52 PM Comments (4)
Summer is nearly here and Gazpacho is on the menu...
Friday, May 30, 2025
Gazpacho is one of the most international dishes of Spanish gastronomy. Refreshing, low in calories and very easy to make. It is one of the star dishes of the summer, which, accompanied by a bit of crusty bread and a delicious dessert, will provide a solution to many of our meals this coming summer.
Making gazpacho, in principle, is quite a simple task, but like everything else, it has its tricks and you will eventually tweak it to your liking the more your make it.
The most popular version of the recipe for this cold soup is tomato, pepper, onion, garlic, cucumber, bread, and oil. Despite the fact that many think that gazpacho is originally from Andalusia, it has been proven that previous recipes already existed. However, there is no doubt that this one is the most famous version of them all. Most versions of this recipe will vary depending on the amounts of vegetables you used, which is why there are so many different flavours, everyone has different tastes - some prefer more garlic, some less, some more cucumber, some less, in the end, it's really up to you! But as a starting point this is what you need:
Ingredients
800 grams of ripe tomato
1 onion
2 cloves of garlic
1 green pepper
1 red bell pepper
Spanish half cucumber
150 grams of stale bread
1 teaspoon of sweet paprika
1 tablespoon cumin
Salt
50-100ml Extra virgin olive oil
30ml sherry vinegar
Water
Steps to take:
Wash all the vegetables well, cut them into medium-sized pieces and put it all in a bowl. Add half of the oil, the vinegar, the salt, the paprika, the cumin and a little water, not much, and leave it to marinate in the refrigerator.
After a few hours of marinating, take the vegetables out of the fridge, blend them with a mixer and pass the mixture through a sieve. Then, use the blender again and while blending, add the rest of the oil little by little. The more oil, the richer it wll be so this will be a matter of taste. If the consistency is too thick for your liking you can add a little more water until you get the consistency you prefer ... that's it! All you have to do now is to season with salt and add a little extra vinegar if you prefer more of a kick. You can decorate the gazpacho with some chopped cucumber, peppers and toasted croutons.
As you can see, making gazpacho is really very simple. Adapt the recipe as you see fit and start experimenting! One piece of advice - try and find the best quality ingredients possible - especially the tomatoes, and you can't go wrong.
2
Like
Published at 7:35 PM Comments (0)
Potato Salads for Summer Time in Spain
Wednesday, May 14, 2025
The potato is one of the most appreciated products due to its low price, versatility, variety and flavour. It is also one of our favourite foods, very present in Spanish gastronomy in which we find countless dishes in which the potato is the protagonist. Among all of these potato recipes, today we will be looking at two very popular cold tapas or ‘portions’ (ración) that you can enjoy as a snack or even a meal at home.
In first place today we have Alioli Potatoes, effectively a potato salad with garlic mayonnaise.
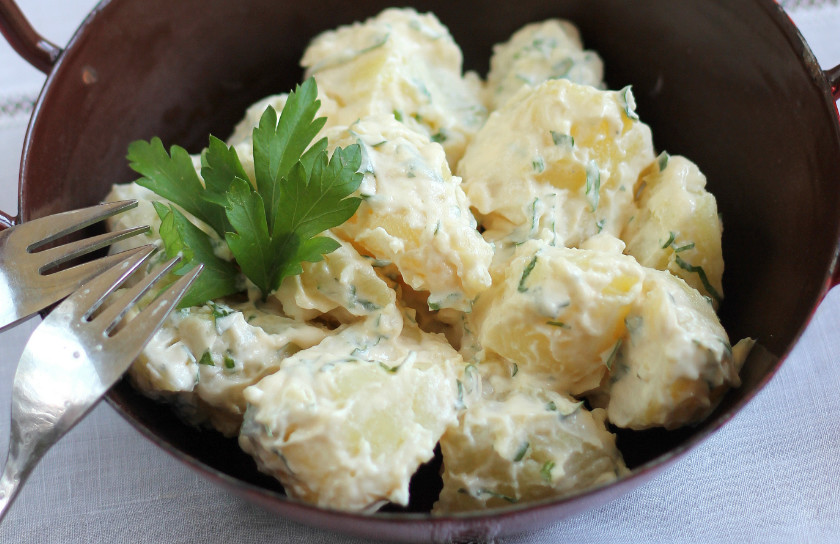
Ingredients for four people: 2 potatoes, 1 egg, 1 clove of garlic, 150 g of sunflower oil, a few sprigs of parsley, salt and a few drops of lemon juice.
Preparation:
- Cook the unpeeled potatoes -well washed- in a saucepan with salted water and remove them after 20 minutes, when they are well cooked.
- Then we peel them and cut them into irregular pieces, leaving them in a bowl to cool well.
- We can prepare the alioli or all-i-oli following the traditional recipe and making it only with garlic and oil, without eggs and in a mortar, or we can do it, like most bars, a simpler version, making mayonnaise with garlic. Here is a link on how to make real Alioli and also a way to cheat. You decide!
HOW TO MAKE IT AND HOW TO CHEAT
- When the potatoes are cold, we add our Alioli sauce and slowly stir it in trying not to break them up. It is better to add the aioli little by little, so as not to overdo it with the quantity.
- Lastly, finely chop a handful of parsley and add it to the Alioli potatoes, and slowly stir it in. Reserve a little more to sprinkle on top when serving and a sprig to decorate.
- We keep the potatoes covered with transparent kitchen film in the fridge for 30 minutes so that they are chilled when we are ready to eat them.
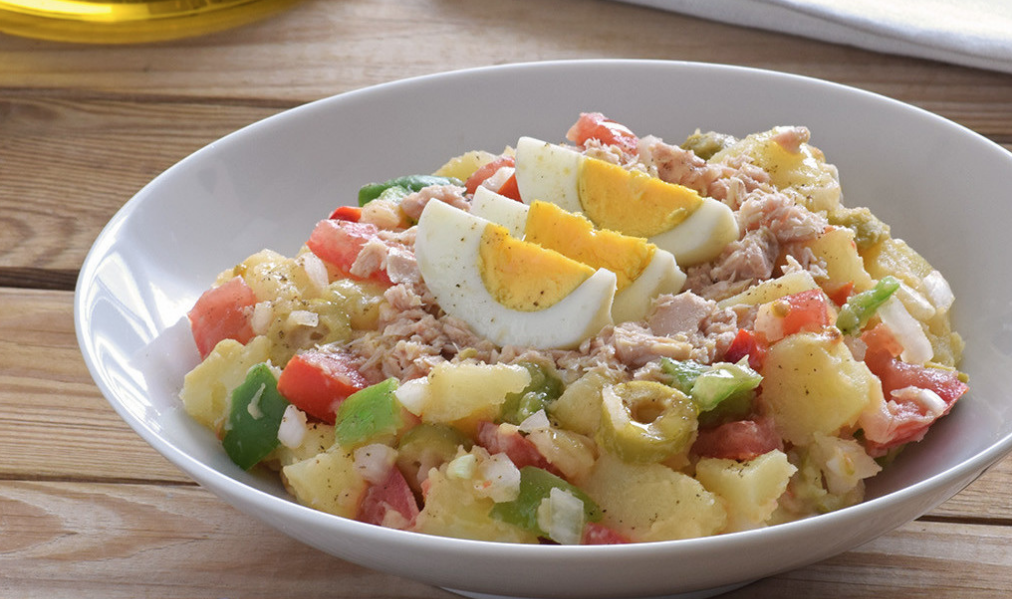
The next fantastic potato dish is Country salad or Ensalada Campera, a great dish for a warm day.
Ingredients for two people:
400 g of potatoes, 1 spring onion, 3 plum tomatoes, 1 green Italian pepper, 1 red pepper, 2 eggs, 1 can of tuna in oil or natural (or bonito), 10 green or black olives, 60 ml of extra virgin olive oil, 15 ml of sherry or white wine vinegar, 5 ml of lemon juice, salt and ground black pepper.
Preparation:
- The first, and almost the only "complex" step, is to cook the potatoes and eggs.
- To do this, you have to wash the first ones before putting them to cook in a pot or casserole with plenty of salted water, although they can also be steamed. Boiling is more practical because we can take advantage of it to cook the eggs at the same time.
- After about 9-12 minutes of cooking, remove the eggs and allow to cool slightly before peeling.
- Continue cooking the potatoes until they can be pierced with a knife without difficulty. The important thing is that they are not raw or very hard, although, again, you can adjust the texture as you like.
- Drain and let cool until we can peel them without burning ourselves.
- Wash the peppers well, open and remove the seeds. Cut into small cubes or strips.
- Finely chop the onion and also chop the tomatoes.
- Combine all the ingredients in a bowl adding the sliced olives, the potatoes, season lightly and mix.
- Prepare the vinaigrette by emulsifying the oil with the vinegar, lemon juice and seasoning to taste. Serve with a drained can of tuna or Bonito del Norte (my favourite), spread it on top, add the peeled and cut eggs and dress as desired.
- We can also simply mix the tuna and the egg with everything else, although the presentation is a little less elegant!
Enjoy!
1
Like
Published at 11:08 PM Comments (2)
Soup time...but hot soup time
Friday, May 9, 2025
 Although tomatoes are around all year, their natural season in Spain is just around the corner. So if you soon find yourself with a load of tomatoes stacked up and are fed up drinking gazpacho every day and eating tomato salads, this is a wonderful Mediterranean alternative to a great Heinz classic from every Brit's childhood. However the quality of the tomato is key to this recipe, the soup will only be as good as the tomatoes are, so if you can find a local farmer or market they will be far better than the ones you will get in the supermarket which have already experienced refrigerated storerooms, they also tend to be much bigger when homegrown. However we want the tomatoes to be pretty ripe and not too hard, the riper they are the fuller the flavour. This recipe is a particular favourite of my daughter who is incapable of eating raw tomatoes, cooked or tomatoes in any which way or form unless it is in a warm soup, with no bits in it! I like to use large plum tomatoes, as they are full of flavour when ripe. Although tomatoes are around all year, their natural season in Spain is just around the corner. So if you soon find yourself with a load of tomatoes stacked up and are fed up drinking gazpacho every day and eating tomato salads, this is a wonderful Mediterranean alternative to a great Heinz classic from every Brit's childhood. However the quality of the tomato is key to this recipe, the soup will only be as good as the tomatoes are, so if you can find a local farmer or market they will be far better than the ones you will get in the supermarket which have already experienced refrigerated storerooms, they also tend to be much bigger when homegrown. However we want the tomatoes to be pretty ripe and not too hard, the riper they are the fuller the flavour. This recipe is a particular favourite of my daughter who is incapable of eating raw tomatoes, cooked or tomatoes in any which way or form unless it is in a warm soup, with no bits in it! I like to use large plum tomatoes, as they are full of flavour when ripe.
This recipe couldn’t get any more Mediterranean, all ingredients and herbs used to form the backbone of Mediterranean cooking so if you have tomatoes in your vegetable drawer which are going soft and aren’t up to scratch for the salads, don’t throw them away, this is what you do with them….
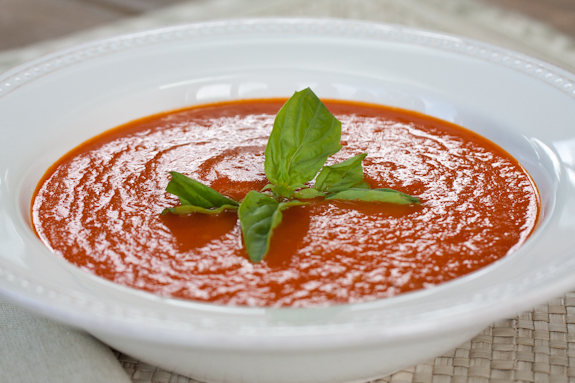
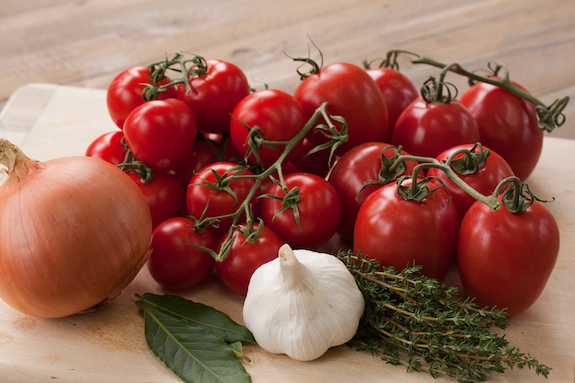
Mediterranean-style Tomato Soup - 4 servings
1.25 kg. Ripe Tomatoes
1 Medium Yellow Onion
3 Garlic Cloves
1 tsp. Sea Salt
Fresh Ground Pepper
Dried Thyme and Rosemary
1 tsp. Paprika
1 tbsp. Chopped Parsley
1 medium-sized carrot
1 Stick of celery
500ml Vegetable Stock (or chicken)
1 tbsp. Concentrated Tomato Paste
1 tbsp. Heavy Cream (optional)
Extra Virgin Olive Oil (Recommended: Oro Bailén “Reserva Familiar” - Picual)
Fresh Oregano & Basil for garnish
Firstly, prepare your vegetables. You need 1.25kg of ripe tomatoes. If the tomatoes are on their vines, pull them off and wash the tomatoes. Now cut each tomato into quarters and slice off any hard cores (they don't soften during cooking and you'd get hard bits in the soup at the end). Peel 1 medium onion and 1 carrot and chop them up into pieces. Chop 1 celery stick roughly the same size. Take 3 cloves of garlic but do not peel them, just chop of the stem root tip, the skin will prevent them from burning but they will still release their flavour. The garlic will go all soft and oozy inside the skin with a rich roasted flavour. Finely chop up 1 tbsp of fresh parsley.
Preheat the oven to 200ºC. Spread all the ingredients on a rimmed non-stick baking tray. Drizzle with extra virgin olive oil (preferably Picual). I mentioned the brand “Oro de Bailén” as it has a wonderful fruity-green tomato flavour and aroma, which is ideal for this dish and is available in Carrefour. Sprinkle on the salt, ground pepper, thyme, rosemary, paprika and the chopped parsley. Roast on the middle rack for 30-40 minutes until the tomatoes have broken down and reduced to about half their size and the onions are partially caramelised.
 12.23.30 - Copy 1.png) Remove and cool slightly. Warm the vegetable stock and stir in the tomato paste to dissolve. Now find the garlic cloves and remove their skin, they will just fall off in your hand. Add all of the ingredients from the roasting pan into the stock and let it gently simmer for 5-10 minutes, make sure every drip of that rich olive oil goes in too! Use a blender to puree the soup in the pan. The soup should be smooth, with some texture. If you don't like any texture at all, just run it through a fine sieve. Remove and cool slightly. Warm the vegetable stock and stir in the tomato paste to dissolve. Now find the garlic cloves and remove their skin, they will just fall off in your hand. Add all of the ingredients from the roasting pan into the stock and let it gently simmer for 5-10 minutes, make sure every drip of that rich olive oil goes in too! Use a blender to puree the soup in the pan. The soup should be smooth, with some texture. If you don't like any texture at all, just run it through a fine sieve.
Return it back to the pot, and add some cream to taste, if you want it creamy that is, otherwise it is ready to eat. Taste for salt and pepper and serve with some thick toasted bread grilled with manchego cheese. Garnish with fresh chopped basil and oregano. Listo! Enjoy!

0
Like
Published at 11:56 PM Comments (1)
A Taste of Argentina - Chimichurri
Friday, April 25, 2025
 Temperatures are warming up and soon it will be time to start grilling and enjoying some outside cooking, if you're not already doing it! Whether on a terrace in the city centre, in the country or in an authorised picnic area outdoors, a barbecue is an event that always manages to gather people together. I just love the smell of a barbecue! Temperatures are warming up and soon it will be time to start grilling and enjoying some outside cooking, if you're not already doing it! Whether on a terrace in the city centre, in the country or in an authorised picnic area outdoors, a barbecue is an event that always manages to gather people together. I just love the smell of a barbecue!
Today I want to share a recipe, or should I say, a version of a recipe that I first discovered in Madrid and then later rediscovered in Buenos Aires. OK, it’s not a Spanish recipe as such because the honours belong to Argentina, although there is cause to believe that it originated in the Basque Country. But anyway, who cares? It’s a recipe that is simple and the star of any barbecue.
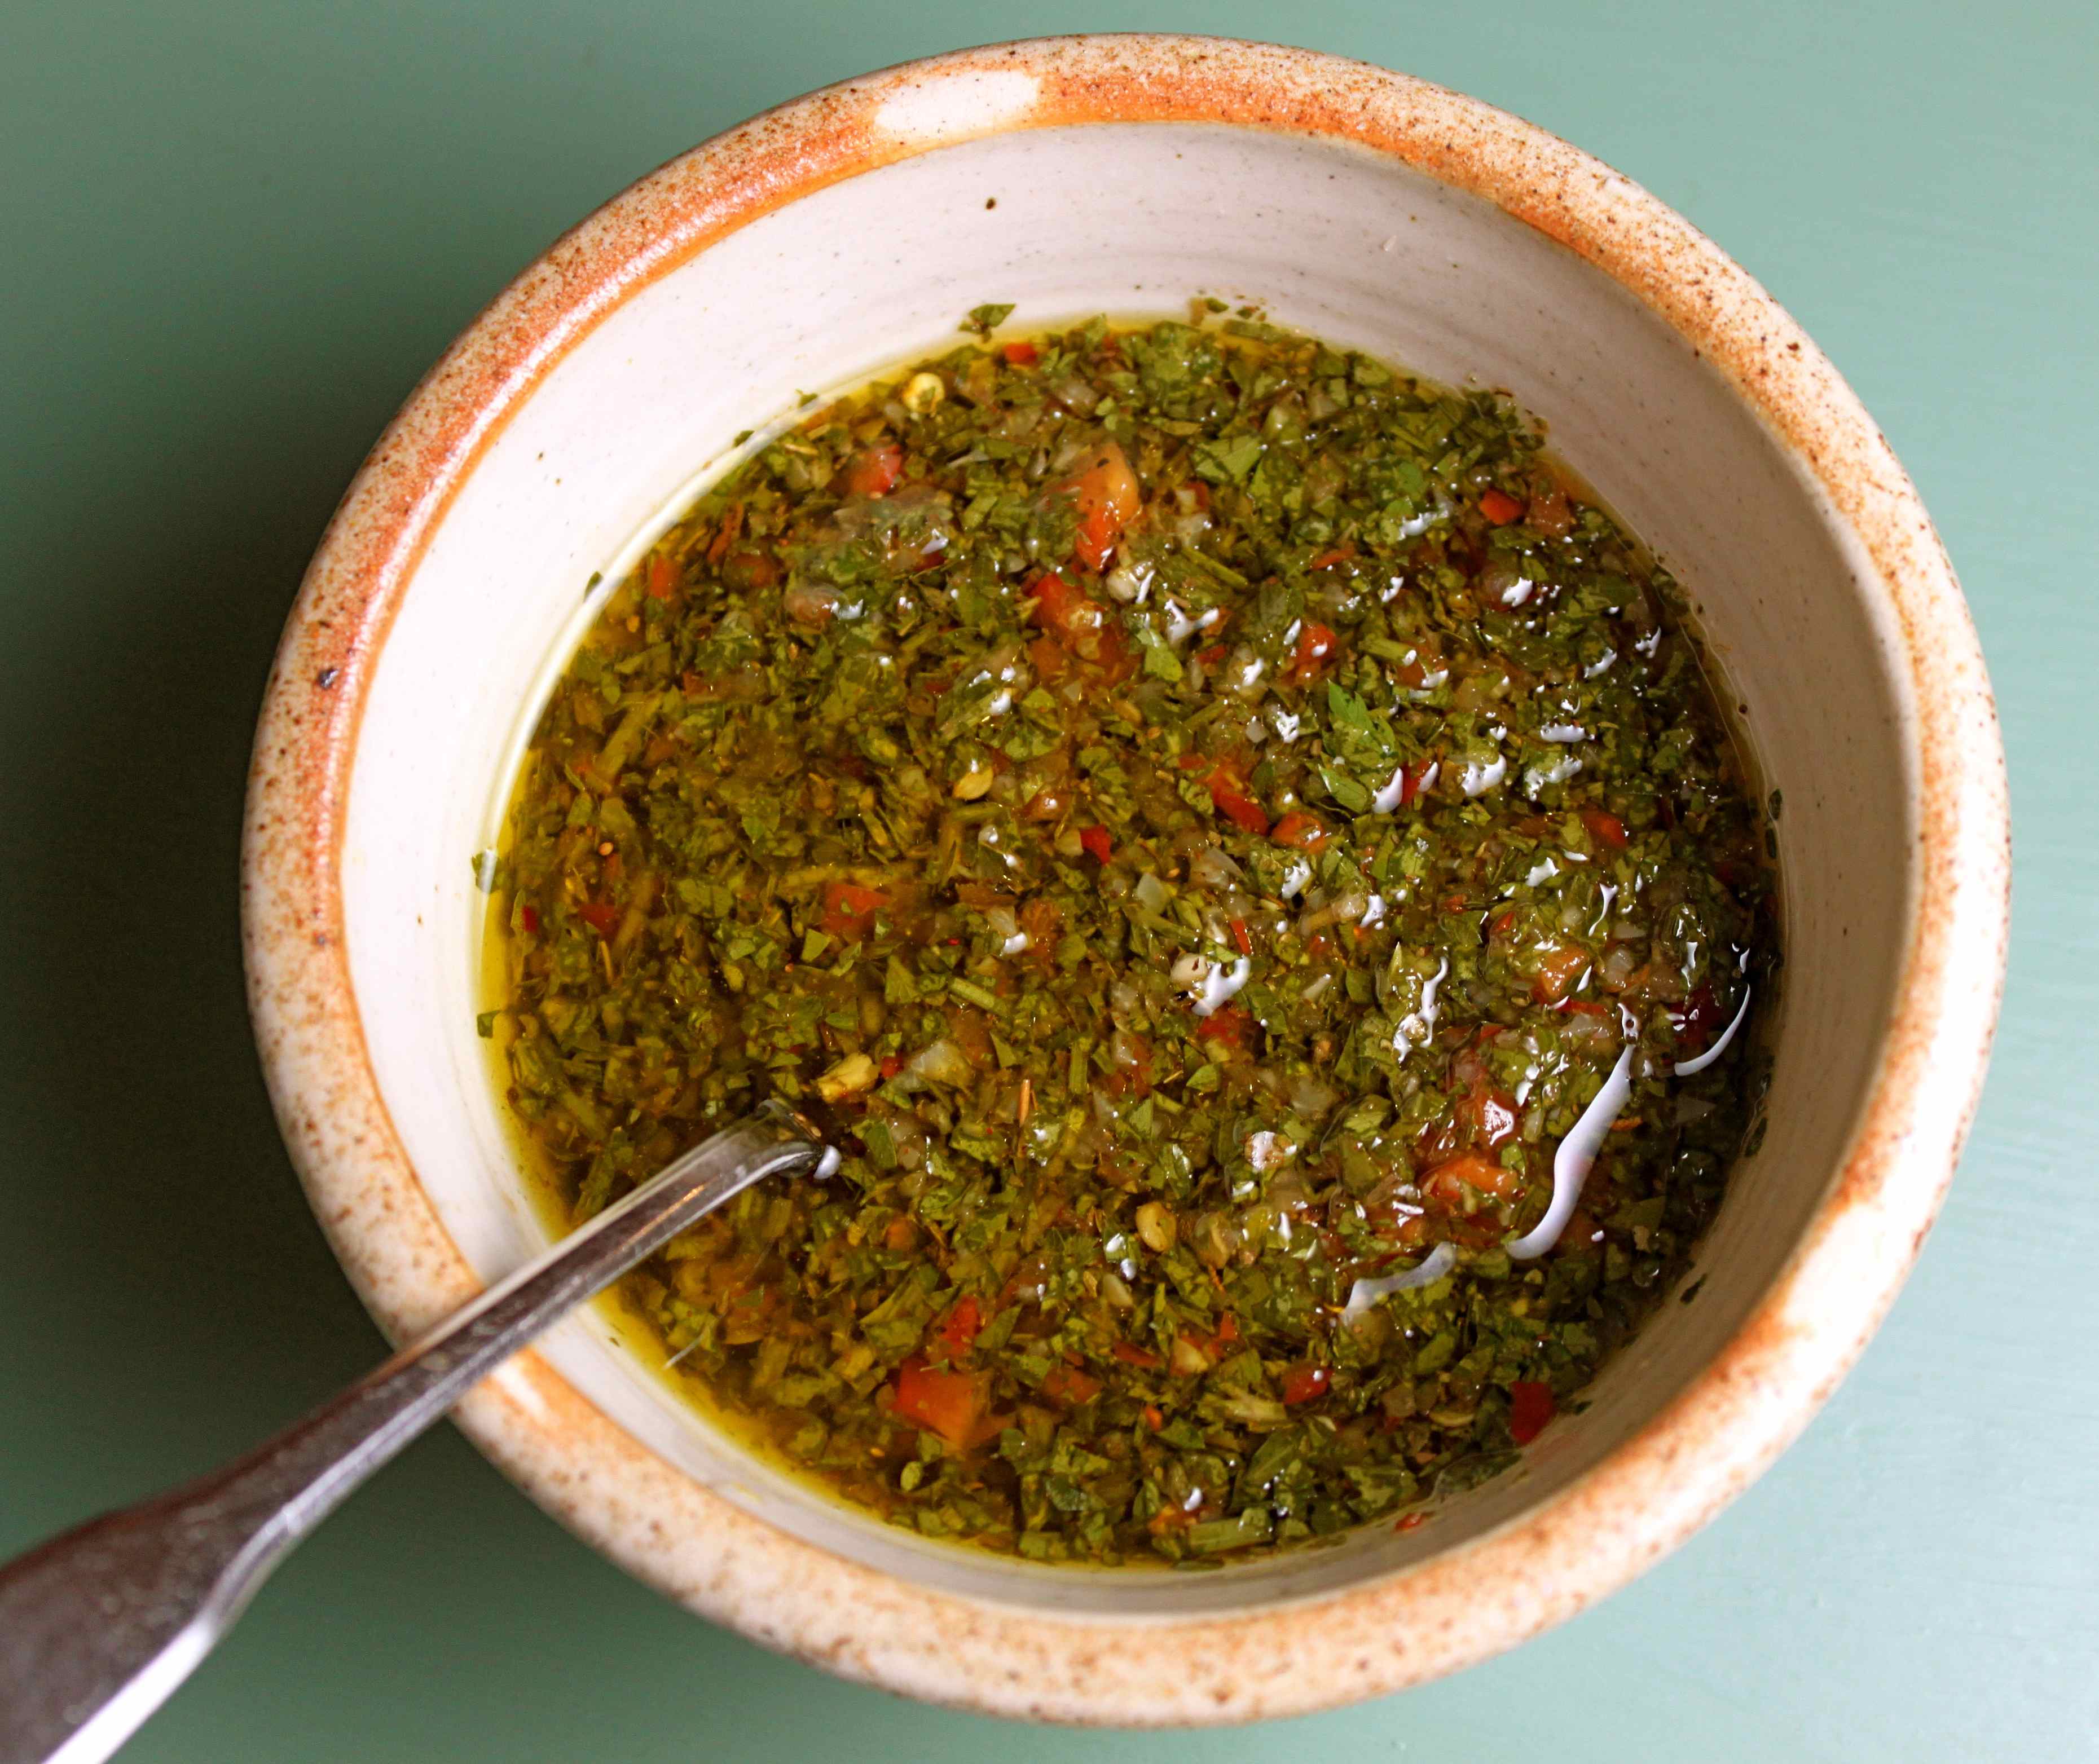
When I first landed in Spain, I rented an apartment in the centre of Madrid next to Plaza de Isabel II and on the corner was a restaurant called La Vaca Argentina, in those days fat and calories weren’t on my worry list and I would visit the restaurant several times a week to have a glass of cold beer and a tapas of grilled chorizo sausage with chimichurri. I had already fallen in love with chorizo but it was the chimichurri that was amazing. This fresh, tart and tangy concoction of herbs, garlic, oil and vinegar had me totally won over.
However, it wasn’t until I went to Argentina one year later that I learnt how to make it, but as is the case with most staple recipes, every household has its own variation and depending on what you have available to you. This ‘sauce’ is ideal for grilled meats of all kinds, sausages, pastries, and you can even drizzle it over a margarita pizza, giving it a really special touch. It just about jazzes up any meal. The great thing about it is that you can make a decent quantity and it will keep in the fridge for at least a week to 10 days.
The Spanish connection goes back over a century. In the 19th Century, many Basques settled in Argentina and the name of the sauce probably comes from the Basque word ‘tximitxurri’ that loosely translates as "a mixture of several things in no particular order". That is effectively what it is, a concoction of herbs and oil where the order or the recipe doesn’t really matter. However, there is one step that will speed up the final result and that is adding the hot water to all the dehydrated ingredients before mixing with everything else. You should let them sit for about 30 minutes until all the water has been absorbed and the dried herbs have totally softened. From that point on you can mix and match as you wish the rest of the ingredients. This is not a purist’s chimichurri recipe but my take on it, and if you don’t mind me saying say so, it is really tasty!
You will need the following:
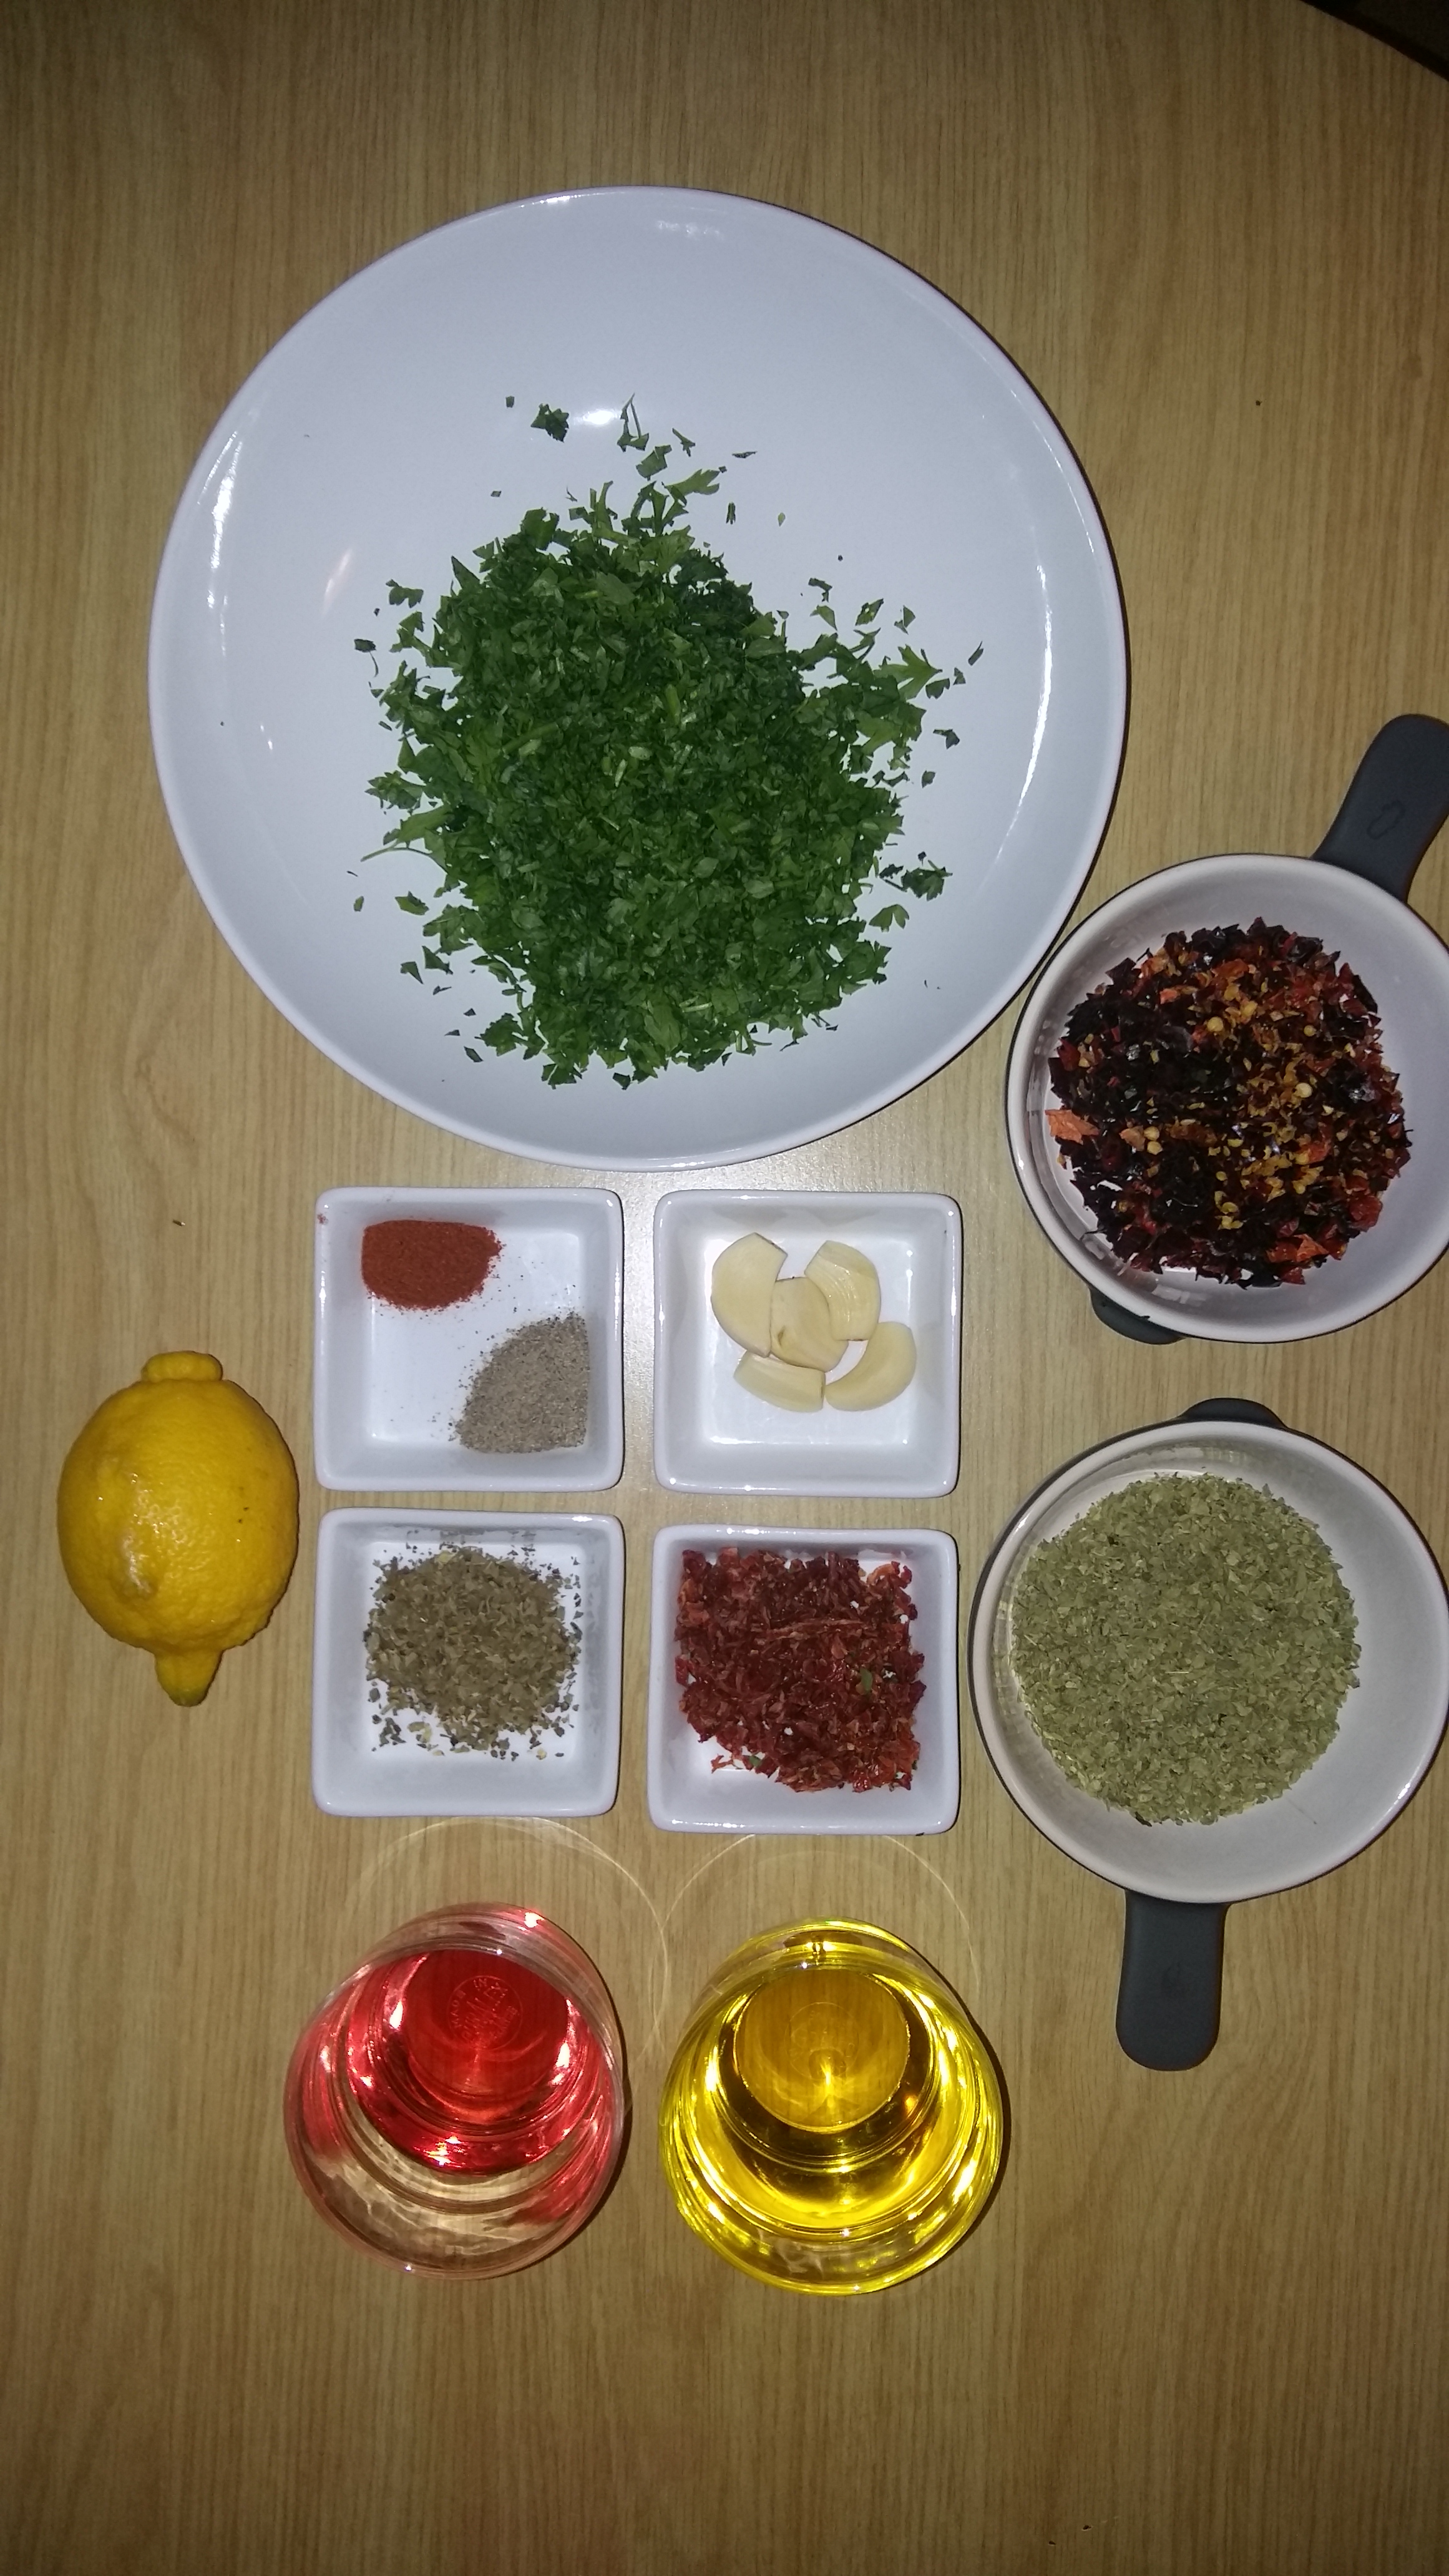
1 Cup of chopped fresh parsley
2 Tablespoons of dried oregano
2 Finely Chopped dried Ñora peppers
1 Tablespoon of crushed dried chilli flakes
1 Tablespoon of dried basil
4 or 5 Freshly peeled garlic cloves, finely minced (or put through a garlic press)
¼ Cup of red wine vinegar
½ Freshly squeezed lemon (juice only)
5 Chopped sun dried tomatoes
¼ Cup hot water
½ - ¾ Cup of mild olive oil (add to taste – if vinegar is too strong)
1 Teaspoon black pepper
1 Teaspoon sweet Paprika
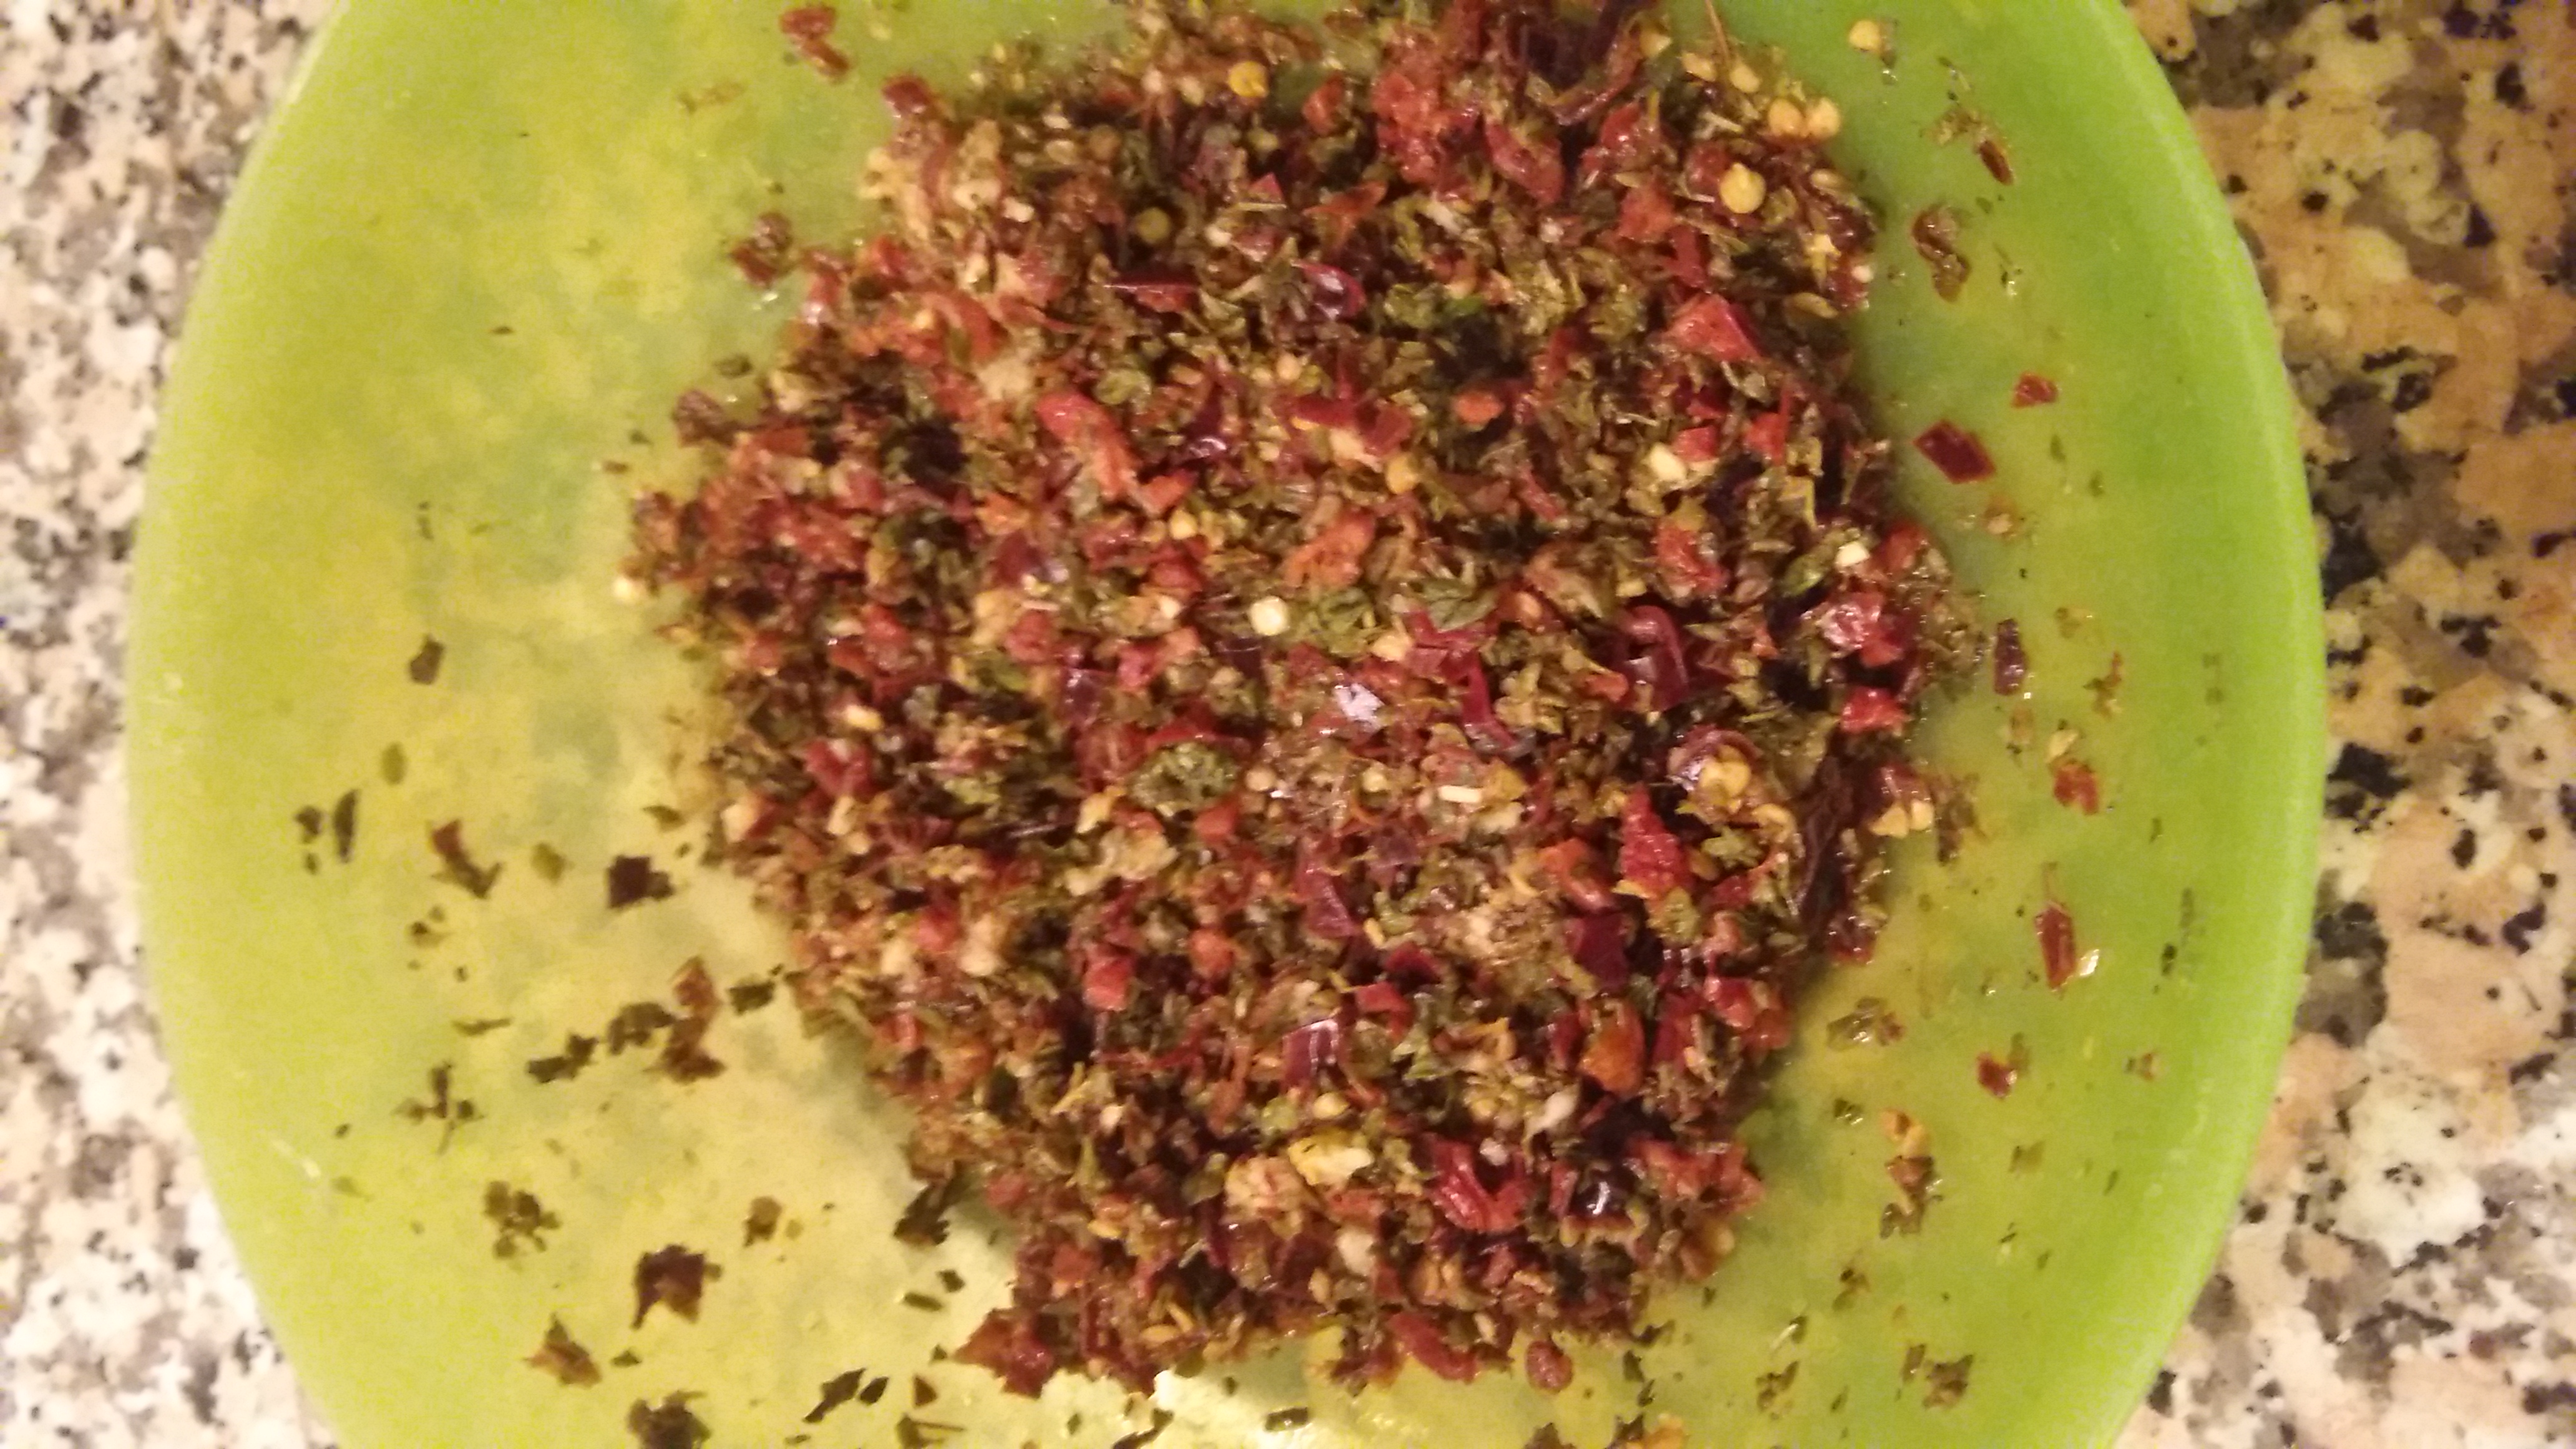
Combine all ingredients in a bowl, mix and then fill a sterilized jam jar with all the mixture and let it macerate in the fridge overnight before using it. It is always best after about 6-8 hours. Then just drizzle it over whatever you want! I highly recommend what is called a ‘Choripan’; a grilled chorizo sandwich with chimichurri sauce.
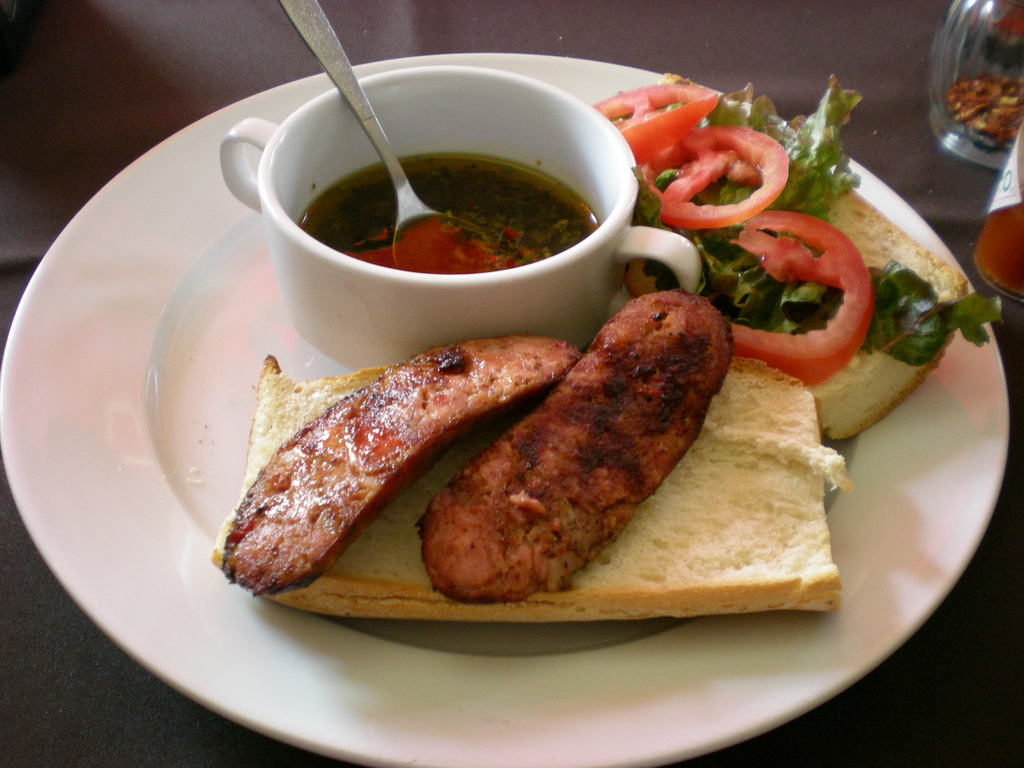
Absolutely incredible! Enjoy!
2
Like
Published at 7:57 PM Comments (1)
Spam post or Abuse? Please let us know
|
|